I’ve been following Lynx.js for almost a year now. We started talking about it at Callstack right after its release in March 2025.
Back then, Lynx was presented as “brownfield-first”, with guidelines on how to integrate it into existing native apps. From an infrastructure point of view, that made sense: Lynx was essentially extracted from TikTok’s production apps. From a developer experience point of view, especially for newcomers, it was challenging.
If you just wanted to try Lynx, the simplest option was downloading the Lynx Explorer shell app and working purely on the JavaScript layer inside it, but you didn’t actually have a real project structure of your own. The other option was integrating Lynx directly into a native project yourself. Neither path felt like a clean greenfield start.
Over time, the community tried to close that gap. Lynx-cli appeared as a way to bootstrap a project from scratch, sitting somewhere between the brownfield integration story and the shell app approach. I wrote about all three paths in detail in my article on exploring Lynx workflows.
There was another missing piece as well: native navigation. The Lynx website described how to use web routers, and technically that works. But for a mobile-focused technology, relying on web-style routing does not feel like the right default. Navigation on mobile is tied to native containers, transitions, lifecycle, and platform conventions.
Now we finally have those pieces coming together in one place: Sparkling, the application layer built around Lynx.
What Sparkling is to Lynx
Sparkling was soft-launched in late December by the TikTok infrastructure team. It may look new from the outside, but it originates from internal tooling and application architecture that has already proven itself at scale within TikTok.
The easiest way to think about it is this: Sparkling plays a role for Lynx similar to what Expo plays for React Native. It builds on top of the core runtime and provides the surrounding application and tooling layer.
Today, Sparkling includes:
- A CLI to bootstrap a greenfield Lynx app
- A native navigation system based on a scheme-driven container model
- Sparkling Methods, a typed bridge layer for defining and calling native APIs
- Built-in platform APIs like Storage and Media
- Android and iOS SDKs
- Autolinking for registering custom native modules
Lynx itself focuses on rendering and its dual-thread execution model. Sparkling focuses on how an app is structured, started, navigated, and extended with native capabilities.
It’s important to understand that Sparkling did not originate as a greenfield CLI experiment. It grew out of TikTok’s brownfield architecture, where Lynx pages live inside native containers and are opened through deeplink-like schemes.
The Sparkling CLI is a newer, community-facing layer that allows you to experiment with that architecture in a standalone greenfield setup.
Bootstrapping a project with the Sparkling CLI
Sparkling ships with its own CLI, so instead of setting up a native host manually or using a shell app, we can generate a new Lynx app from scratch and run it locally.
I’ll start by scaffolding a fresh project and then we’ll look at what it actually gives us.
Prerequisites (quick sanity check)
Sparkling’s tooling expects a fairly modern setup:
- Node.js 22 or 24
- Android: Android Studio / SDK, JDK 11+
- iOS: Xcode 16+, Ruby >= 2.7 and < 3.4 (plus CocoaPods)
If something fails later, npx sparkling doctor is the first thing to run.
Although as I’m writing this, there is an issue with doctor, which isn’t a great start.
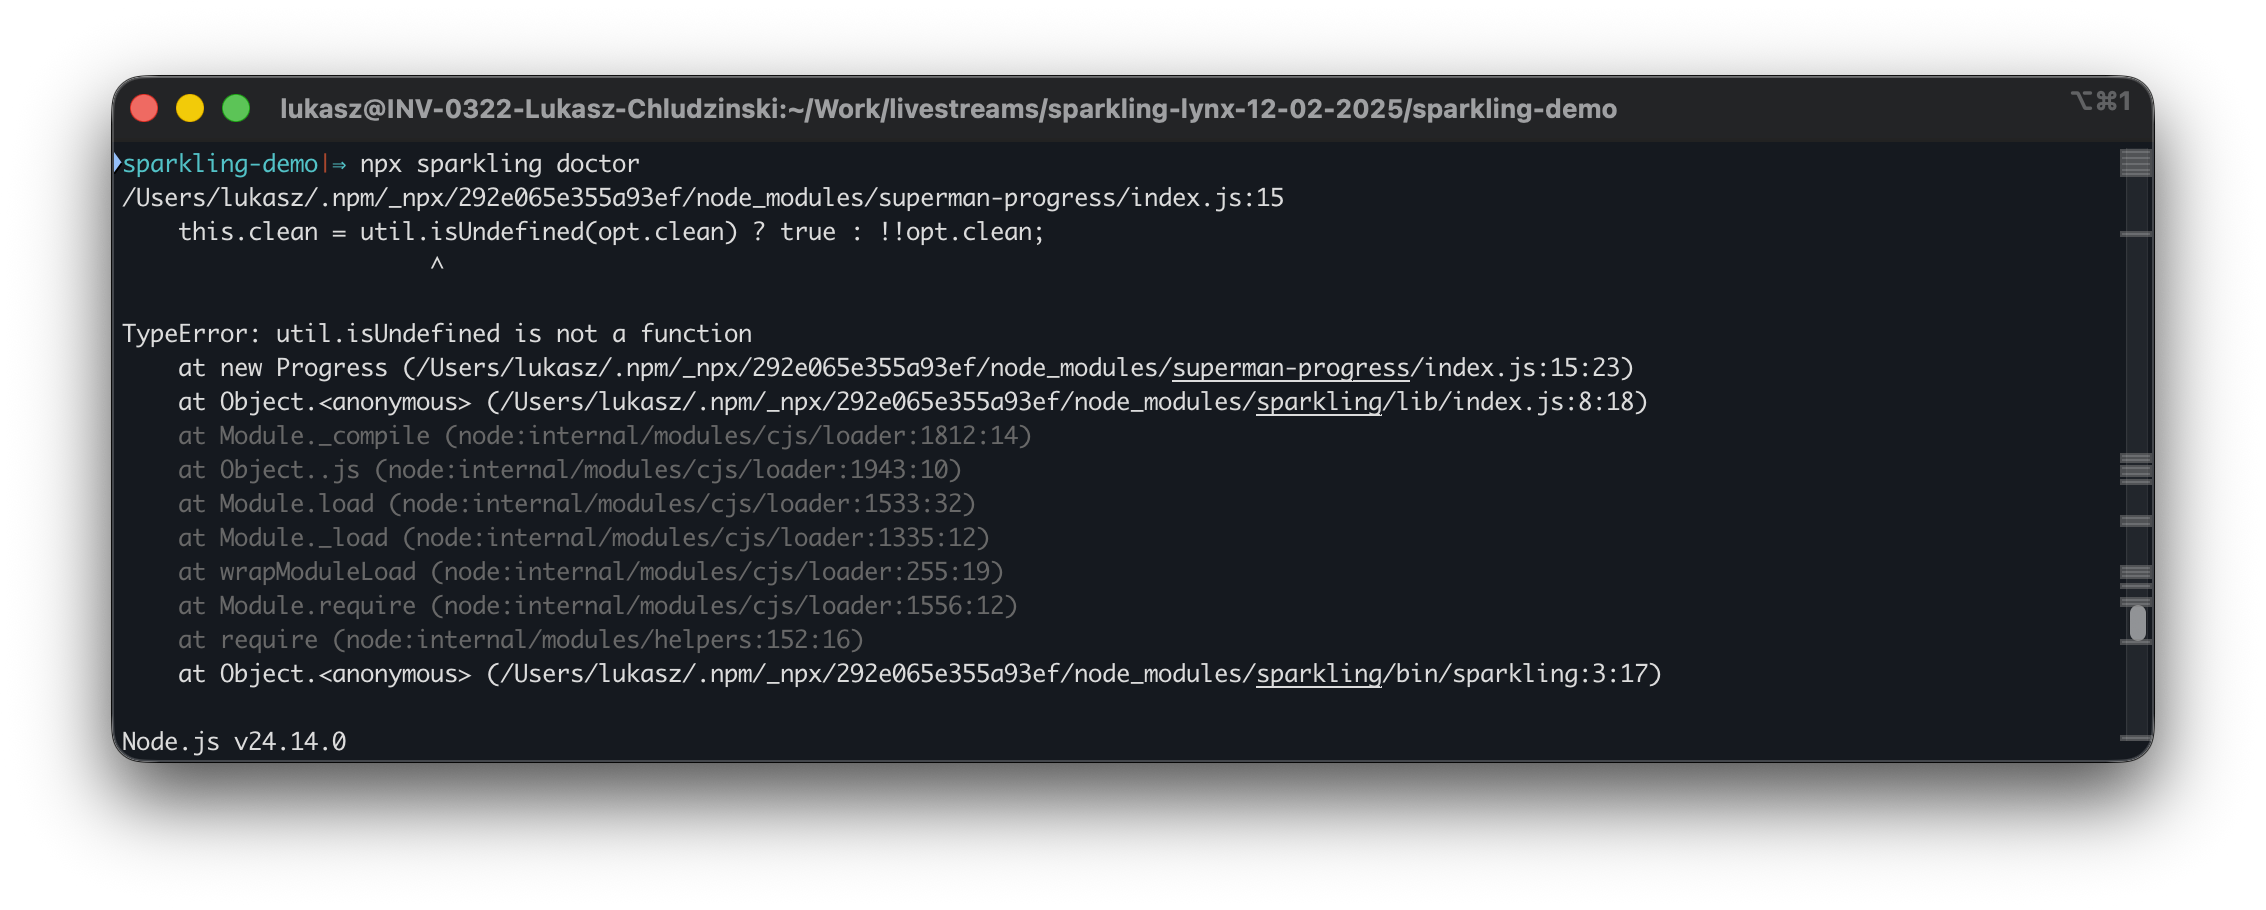
Let’s not get discouraged though.
I expected a few quirks and hiccups from a project that was released this quietly. And if everything works, who needs doctor anyway?
There will be a couple of rough edges throughout this article as well. I’ll circle back to them at the end and put them into context.
Create a new app
The official scaffolder is create-sparkling-app:
npm create sparkling-app@latest sparkling-app-demoRunning the create command walks us through a few interactive prompts: template selection, Android build format, optional tooling, package namespace, and whether to initialize git. I’ll stick with the defaults for now.
After confirming the setup, the CLI installs dependencies, prepares native targets, and generates the project. Here’s what the full terminal output looks like during creation:

At this point, we have a working project on disk. Before running it, let’s take a look at what was actually generated.
Here’s the top-level structure of the app:
.png)
Understanding the generated project structure
At the top level, the project is split into three main areas: native, app code, and configuration.
Native folders: android/ and ios/
These are fully generated native projects. You can open them directly in Android Studio or Xcode and run them like any other mobile app. Sparkling wires them to load your Lynx bundle automatically.
Application code: src/ and resource/
src/ is where your Lynx app live:
pages/contains your screensassets/holds static resources- Type definitions and base styling are already set up
This is the layer you’ll work in most of the time.
resource/ contains app-level resources, such as the app icon.
Configuration: app.config.ts
This file is consumed by sparkling-app-cli. It controls build behavior, routing configuration, and how the bundle is prepared for native shells.
We’ll touch it later when we look at routing.
Development workflow (package.json)
The development flow is defined in package.json:
"scripts": {
  "build":"sparkling-app-cli build --copy",
  "autolink":"sparkling-app-cli autolink",
  "test":"vitest run --passWithNoTests",
  "run:android":"sparkling-app-cli run:android",
  "run:ios":"sparkling-app-cli run:ios --copy"
}
For now, the only commands that matter are:
run:androidrun:ios
Let’s run the app.
First run notes (template quirks)
I managed to get both platforms running side by side, but iOS looks a bit rough around the edges.
- No app icon: the iOS build launches with the default placeholder icon.
- Navigation container corners: screens sometimes show rounded corners during the transition, then snap back to square once navigation finishes.
- Main screen image: the UI shows an image placeholder, but the image itself never renders on iOS.
None of these block development, but they do match the vibe of a quiet release. The scaffolding is there, the core loop works, but not every detail feels polished yet.
If I get answers for what’s expected here (template bug vs missing setup step), I’ll update this article with the fixes. I’ve already filed a few issues in the repository to clarify what’s intentional and what might be template gaps.
Dev server reality check
Hot reload is part of the Lynx story. Rspeedy gives you a proper development server and live reload when working with Lynx directly. So naturally, I expected a similar workflow here.
With Sparkling, I struggled a bit to figure out what the intended developer loop is.
First, there’s no obvious dev script in package.json. The template exposes run:android and run:ios, both going through sparkling-app-cli, but nothing that clearly starts a JS dev server.
Fine. Let’s use Rspeedy directly:
npx rspeedy devNope. It can’t find a lynx.config.ts.
Alright, let’s point it to the existing config:
npx rspeedy dev--config app.config.tsNope again. app.config.ts isn’t an Rspeedy config file. It default-exports a Sparkling AppConfig object, and one of its fields is the lynxConfig that Rspeedy would normally expect as the default export. Rspeedy loads the file, sees the Sparkling object at the top level, and fails validation.
I ended up extracting the lynxConfig portion into a separate lynx.config.ts file. After that, Rspeedy starts correctly and the dev server runs.
.png)

And then, after all that gymnastics, Xuan replied to my question about this. The easiest way to do it is:
npx rspeedy dev --config .sparkling/lynx.config.ts// .sparkling/lynx.config.ts
import cfgModule from '../app.config.ts'
const cfg: any = (cfgModule as any).default ?? cfgModule
export default (cfg.lynxConfig ?? cfg) as anyBoth approaches are equivalent, and the result is the same:
Even with the dev server running, the generated iOS and Android templates don’t seem to connect to it. The native shells continue loading the bundled assets copied into the app. I searched through the native folders for anything referencing localhost, bundle URLs, or a dev server switch, and there’s nothing obvious.
So at the moment, the workflow feels centered around: build ->copy ->run, rather than a live dev server loop.
I asked the Sparkling team about this. Internally they already have this solved, but that workflow hasn’t been exposed publicly in Sparkling yet. This part of the developer experience is actively evolving.
Wrapping up the bootstrap
As visible in the video above, the app runs on both iOS and Android. It launches as a proper native app and has native navigation configured out of the box.
The way pages are rendered is pure Lynx: lowercase elements, CSS styling, the dual-thread model under the hood. If you’re curious, go through the generated files in src/ and inspect how pages are structured.
As for how navigation actually works, that’s coming in the next section. Read on.
Sparkling navigation in practice
Navigation was one of the missing pieces in the early Lynx story.
The app we just generated already uses sparkling-navigation, as you can clearly see in the working example. The main screen pushes to the second screen using native containers, not a web router living inside a single JS runtime.
Let’s take a closer look at how it works and what it actually gives us.
Navigation configuration
If you look at app.config.ts, you’ll find this section:
router: {
   main: {
     path: './lynxPages/main',
   },
   second: {
     path: './lynxPages/second',
   },
},
This is the routing table for the app.
Each key (main, second) is a route identifier. Under the hood, Sparkling maps these to native containers that load the corresponding Lynx bundle entry.
Now look at the Rspeedy configuration inside lynxConfig:
source: {
  entry: {
    main: './src/pages/main/index.tsx',
    second: './src/pages/second/index.tsx',
  },
},
Each entry produces a separate Lynx bundle. The route names match the entry names.
When you navigate to second, Sparkling opens a native container and loads the second bundle into it.
Navigating between pages
In Sparkling, navigation is exposed to the JS/Lynx side through sparkling-navigation: a small helper that opens and closes Sparkling pages (native containers) from your Lynx code.
There are two main ways to do it:
Provide the full scheme
open() takes a scheme string (for example hybrid://lynxview_page?...) and opens it.
This is the API used in the default template.
import * as router from 'sparkling-navigation'

router.open({
    scheme: 'hybrid://lynxview_page?bundle=second.lynx.bundle&title=Second%20Page&screen_orientation=portrait'
  },
  (res) => { console.log(res.code,res.msg); }
);
Provide the bundle path, Sparkling builds the scheme
navigate() is a convenience wrapper: you pass a relative bundle path like main.lynx.bundle (not a full scheme), plus optional params, and it builds a hybrid://... scheme internally and opens it.
import * as router from 'sparkling-navigation'

router.open({
    scheme: 'hybrid://lynxview_page?bundle=second.lynx.bundle&title=Second%20Page&screen_orientation=portrait'
  },
  (res) => { console.log(res.code,res.msg); }
);
A few details that matter:
pathmust be a relative bundle path (example in docs:main.lynx.bundle).baseSchemedefaults tohybrid://lynxview_pageoptions.paramsare merged into the scheme as query params.- You also get
replace/replaceTypeoptions for “replace-like” behavior instead of pushing a new container.
Closing a page
To close the current page (container), use close():
import { close } from 'sparkling-navigation';

close();
You can also close a specific container by ID (optional params).
Adding a new page
The template ships with two pages: main and second. Let’s add a third one and wire it properly.
Create the page
Inside src/pages/, I copied the existing second page folder, and changed a few things in App.tsx
// src/pages/third/App.tsx
import { useCallback, useEffect } from '@lynx-js/react';

import { close } from 'sparkling-navigation';

import './App.css';

export function App(props: { onMounted?: () => void }) {
  useEffect(() => {
    console.info('Hello, This is my custom Sparkling third page');
    console.info('lynx.__globalProps', lynx.__globalProps);
    props.onMounted?.();
  }, [props]);

  const onClose = useCallback(() => {
    close();
  }, []);

  return (
    <view className="page">
      <view className="App">
        <view className="Banner">
          <text className="Title">This is the third page</text>
        </view>
        <view className="Content">
          <text className="Button" bindtap={onClose}>
            Close
          </text>
        </view>
      </view>
    </view>
  );
}
Register it in lynxConfig
In app.config.ts I add a new entry in the lynxConfig section:
source: {
  entry: {
    main: './src/pages/main/index.tsx',
    second: './src/pages/second/index.tsx',
    third: './src/pages/third/index.tsx',
  },
},
This ensures Rspeedy builds a third.lynx.bundle.
Add it to the router
Still in app.config.ts, I update the router section:
router: {
  main: {path:'./lynxPages/main' },
  second: {path:'./lynxPages/second' },
  third: {path:'./lynxPages/third' },
},
Now Sparkling knows this route exists at the native level.
Navigate to it
From the main page, trigger navigation:
import * as router from 'sparkling-navigation';

const thirdPageScheme = 'hybrid://lynxview_page?bundle=third.lynx.bundle&title=Third%20Page&screen_orientation=portrait';

const openThirdPage = () => {
  router.open({ scheme: thirdPageScheme }, (result: router.OpenResponse) => {
    console.log('Router open page callback: ', result.code, ' ', result.msg);
  });
};

...

<view className="primary" bindtap={openThirdPage}>
  <text className="primary__text">Open third page</text>
  <text className="primary__icon">→</text>
</view>
Rebuild and run.
You can find the commit with the changes here.
Passing parameters to the screens
In the Third page component there’s this line:
console.info('lynx.__globalProps',lynx.__globalProps);Each Sparkling page runs inside its own native container. When that container is created, Sparkling passes a set of values into the Lynx runtime. Those values are attached to the global lynx object. That’s what lynx.__globalProps is. I suspect (although I’m not sure at this time) this should **include the params for the route.
I do want to log it, and see what’s inside. But how do I actually see that log?
DevTool aside
There is no dev server running in the terminal that can spit those logs out for me.
I could use Android Studio and check Logcat and can run from Xcode and read the iOS console, but that’s not the JS workflow I expect.
Lynx JS has its own debugging tool, and we’ve already played around with it on livestreams before. It understands pages, bundles, and the Lynx runtime.
What I didn’t expect is that the Sparkling template does not wire it up by default.
So let’s add it.
I’m following the official guide for Android integration. In the Sparkling template, the changes are minimal and live in two places.
Add dependencies
In app/build.gradle.kts:
implementation("org.lynxsdk.lynx:lynx-devtool:3.6.0")
implementation("org.lynxsdk.lynx:lynx-service-devtool:3.6.0")
Sync the project after that.
Initialize DevTool
In SparklingApplication.kt, add the required imports:
import com.lynx.service.devtool.LynxDevToolService
import com.lynx.tasm.LynxEnv
import com.lynx.tasm.service.LynxServiceCenter
Then create an initializer and call it from existing initSparkling function:
private fun initSparkling() {
  initHybridKit()
  initSparklingMethods()
  initDevTool()
}

private fun initDevTool() {
  LynxServiceCenter.inst().registerService(LynxDevToolService.INSTANCE)
  // set DevTool preset values
  LynxDevToolService.INSTANCE.setLynxDebugPresetValue(true)
  LynxDevToolService.INSTANCE.setLogBoxPresetValue(true)
  LynxDevToolService.INSTANCE.setLoadJsBridge(true)
  LynxEnv.inst().init(this, null, null, null)
  // Enable Lynx Debug
  LynxEnv.inst().enableLynxDebug(true)
  // Enable Lynx DevTool
  LynxEnv.inst().enableDevtool(true)
  // Enable Lynx LogBox
  LynxEnv.inst().enableLogBox(true)
}
After these changes, and rebuilding the project, I finally see:
Hello, Sparkling templateWell, hello to you as well, sir!
That’s a much more reasonable debugging setup. You can find this step under this commit.
More importantly, I can now inspect lynx.__globalProps properly and see what the native container passed into the page.
Back to navigation parameters
Let’s try to pass some params. I’m using the navigate API like this:
const openThirdPage= () => {
  router.navigate({
    path:'third.lynx.bundle',
    options: {
      extra: {
        customExtraString: "I'm a string",
        customExtraNumber: 99,
        customExtraObject: { name: "I'm an object allright!" },
      },
      params: {
        title: 'Custom title',
        customParam: "I'm a custom Param",
      },
    },
  },
  (result:router.OpenResponse) => {
    console.log('Router open page callback: ',result.code,' ',result.msg);
  });
};
So I’m passing two things:
params— which according to the docs should become part of the routeextra— which sounds like arbitrary additional data, but is not explained in docs or in the source code
When I trigger this, the page opens correctly and the navigation bar title becomes “Custom title”. So something is definitely being consumed from params.
But here’s the confusing part.
Inside the Third page, when I log:
console.info('lynx.__globalProps',lynx.__globalProps);I don’t see:
customParam- anything from
extra - any obvious “route params” object
The title is applied, but my custom fields are nowhere to be found in the global props or anywhere obvious on the Lynx side.
At this point it looks like:
paramsis used by Sparkling to configure the native container (for example the title)extramight be native-only- but there is no clear, documented way to read route parameters inside the Lynx page
There must be an API for accessing navigation data, but right now nothing in the docs clearly explains how those values are exposed to the runtime.
So either I’m missing something subtle, or this part of the story isn’t fully documented yet.
Released, but not announced
If some parts of this article felt slightly confusing or inconsistent, that reflects the current state of Sparkling more than anything else. The underlying architecture may have been battle-tested inside TikTok, but the public-facing surface area is clearly still early-stage. The documentation is still evolving, some APIs are present but not fully explained, and certain integration points, like navigation parameters or DevTool wiring, require a bit of digging and experimentation.
What’s also worth mentioning is how the project appeared publicly. There wasn’t a visible launch campaign or coordinated communication around it. The repository was made public without much surrounding context. It feels less like a formal product launch and more like a public beta that quietly opened its doors.
Two weeks ago I reached out to the Lynx and Sparkling team to invite them to join the livestream because there simply wasn’t much official material to go through. During that session they were very transparent about the maturity level of the project and mentioned several times that Sparkling is still in a very early phase.
That aligns with my experience while building this demo. Some of the rough edges I encountered are already known internally, and I’ve been told that improvements are in progress. So the quirks described in this article are not signs of neglect; they’re signs of a project still being actively shaped.
Working with Sparkling right now feels like stepping into something at the beginning of its lifecycle. I wasn’t actively working with React Native when it first came out 10 years ago, but I imagine it must have had a similar energy. There is a strong technical foundation, real native integration, and clear ambition, but also open questions and missing conveniences.
Thanks to Kunyang Lee and Xuan Huang for joining the livestream and answering questions in real time. That kind of openness makes exploring an early ecosystem much easier.
Sparkling is early, and that context matters when evaluating it.
Where Things Stand
After spending time with Sparkling in its current state, a few things are clear:
- The architecture originates from TikTok’s internal setup. It wasn’t designed as a greenfield experiment first.
- The public tooling is still early. The CLI, dev workflow, and documentation clearly need refinement.
- Navigation is native-first. This is a container-based model, not a web router running inside a single JS runtime.
- Some APIs lack clear guidance. Features exist, but it’s not always obvious how they’re meant to be consumed.
- The team is actively iterating. Several of the issues raised here are already being worked on.
If you approach Sparkling expecting a polished developer experience, you’ll likely run into friction.
If you approach it as early public access to an internal architecture, it makes a lot more sense.

Learn more about Cross-Platform
Here's everything we published recently on this topic.