Just when it feels like the JavaScript ecosystem has settled, a new runtime or framework emerges with a fresh idea about how to build for multiple platforms. One of the most interesting newcomers is Lynx JS, a family of technologies from ByteDance, the company behind TikTok. Its architecture is shaped by Xuan Huang, a software architect who previously worked at Meta on the React Forget team. That work evolved into what we now know as the React Compiler. Xuan has since become the public face of Lynx and one of its key technical voices.
Lynx JS gives developers a modern runtime built for performance and native integration. It focuses on efficient rendering, optimized threading, and uses CSS for styling, making it familiar to web developers while running close to native speed.
At Callstack, we recently explored Lynx JS in a live stream session, walking through how to get started, what the tooling looks like, and how our engineers Szymon and Oskar built a CLI to improve the developer experience. This article expands on that session and serves as a written guide to help you understand how Lynx fits into the broader JavaScript landscape.
By the end, you’ll learn what makes up the Lynx ecosystem, how to start your own project, how the Callstack CLI changes the setup flow, and why Lynx JS could become an important player in the future of cross-platform development.
What’s what in the Lynx ecosystem
Lynx was announced in March 2025, in a series of tweets that gave credit to other cross-platform technologies, such as React Native, Flutter, and Cordova. The tone of the announcement stood out because the team didn’t position Lynx as a competitor. Instead, they acknowledged the projects that helped shape the space and set the stage for new ideas around performance and architecture.
Lynx is not a single framework but a collection of tools built around the same core. Together, they form the Lynx family, which includes:
- Lynx JS: The core runtime that runs JavaScript code and handles communication between JS and native layers.
- LynxReact: A React-compatible renderer built on top of the Lynx runtime.
- PrimJS: A lightweight JavaScript engine focused on fast execution and a small footprint.
- RSpeedy: An internal module that optimizes the bridge and rendering speed.
- Lynx for Web: A web implementation that lets developers test and run Lynx components in the browser.
- Lynx Devtool: An Electron-based developer tool for Lynx, providing mobile debugging features.
These pieces follow two main design principles:
- Brownfield first: Lynx can integrate with existing native apps without major rewrites.
- Performance first: Rendering and layout work run on background threads to reduce main-thread load and improve responsiveness.
Lynx currently supports Android, iOS, HarmonyOS, and Web, with signs of experimentation toward other platforms. It aims to combine the flexibility of web development with the responsiveness of native code.
Project setup with Quick Start
The official getting-started guide for Lynx feels very close to the Expo Go experience. After running the setup command, you get a pure JavaScript project that runs inside a prebuilt Lynx host app. There are no native folders or build configurations, which makes the first run simple and fast. You can see the framework in action within minutes and experiment with its rendering and update model without touching native code.
Trying it out
To create a new project, run npm create rspeedy@latest.
You’ll be asked a few setup questions:
- Project name
- Language (JavaScript or TypeScript)
- Testing library
- Linting and formatting tools
Then, install the dependencies with npm install.
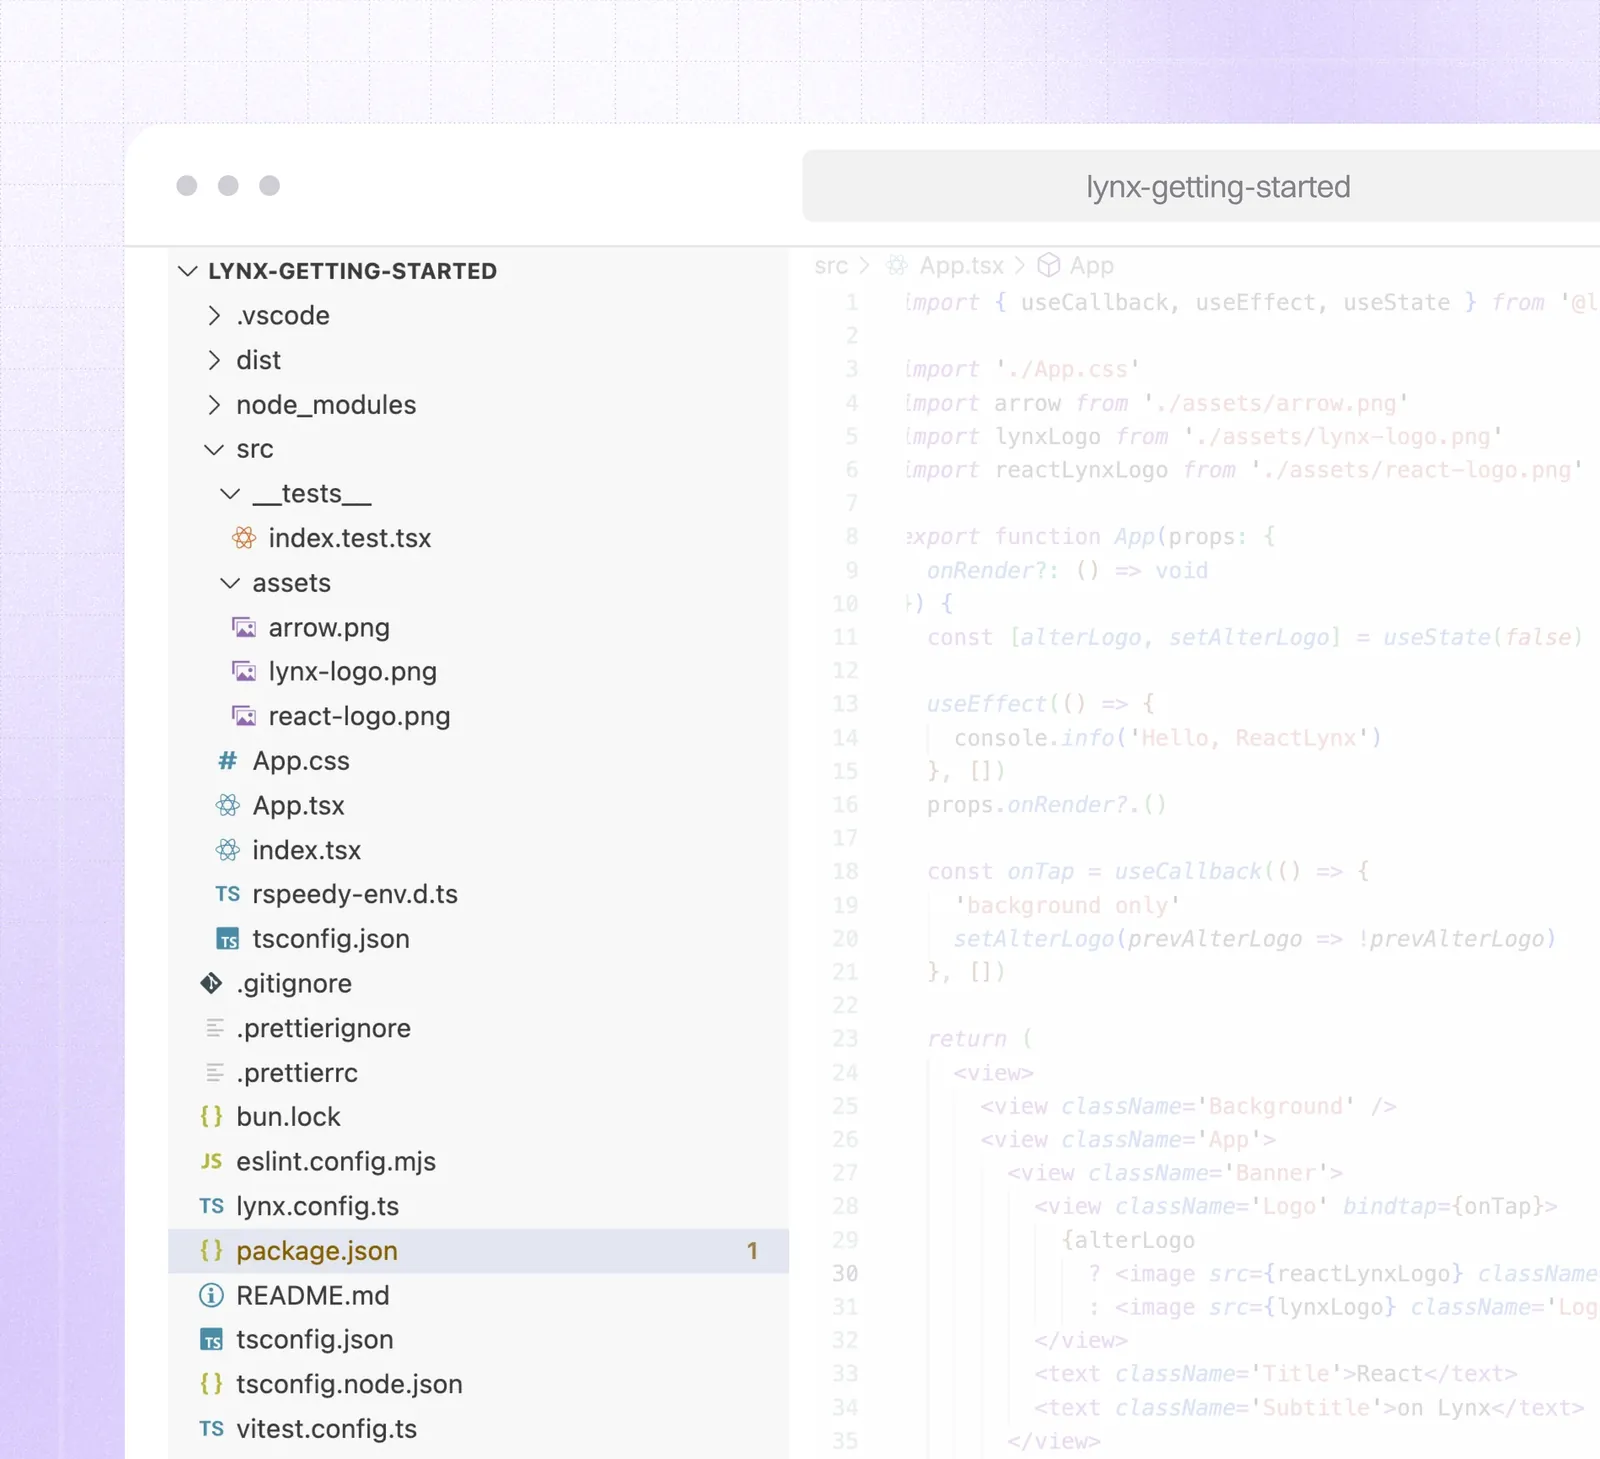
The generated project is intentionally minimal: a single screen rendered through Lynx, a lightweight configuration, and a few scripts to start the bundler. It’s meant to help you explore the runtime quickly without worrying about native setup. This setup is a direct result of Lynx’s brownfield-first philosophy; the framework assumes you might already have a native app in place, so it doesn’t create new native code unless you decide to.
Running the project
The commands provided only start the bundler, not the app itself. There are no run-android or run-ios scripts, because the starter doesn’t include any native code.
To run the app, you use the Lynx Explorer shell, a prebuilt host application that loads your JavaScript bundle. Download it for your platform, install it on a simulator or device, and start your local bundler with npm run dev.
Once the bundler is running and the Lynx Explorer app is connected, your “Hello World” project appears inside the shell.
And that’s your first Lynx app: fully JavaScript-driven, running inside the Lynx host environment.
Now you can open App.tsx, change the code, and see updates instantly. You can even tweak styles in App.css (yes, CSS) and experiment with how Lynx’s two-threaded architecture handles rendering and layout. The developer experience feels fast and familiar, very close to working with React Native.
There is one catch, though: you don’t own the underlying native code. If you wanted to publish this app, or even share it with friends, you can’t. You only own the JavaScript layer. The Lynx website clearly states:
Currently, Lynx is not suitable for building a new application from scratch. You need to integrate Lynx (engine) with your native mobile app or web app, and load Lynx apps through Lynx views.
To do that, you need to create your own native app and integrate Lynx following their guide. That’s quite a bit of work.
Lynx Community CLI
One aspect that stands out in the default Lynx ecosystem is the lack of greenfield project support. The official getting-started flow is great for experimentation, but it doesn’t give you a way to create your own native app from scratch. Coming from React Native, we’re accustomed to running a single command and having both JavaScript and native projects ready to go. Lynx doesn’t offer that out of the box.
That’s the gap that Lynx Community CLI fills. It brings the Lynx developer experience closer to what React Native developers expect: a full project with Android and iOS folders already in place, wired up to the Lynx runtime, and ready to open in Android Studio or Xcode.
How it works
The CLI lives in the lynx-community organization on GitHub and consists of two main parts:
- A core package that provides commands and configuration logic
- A template package with ready-to-use native projects
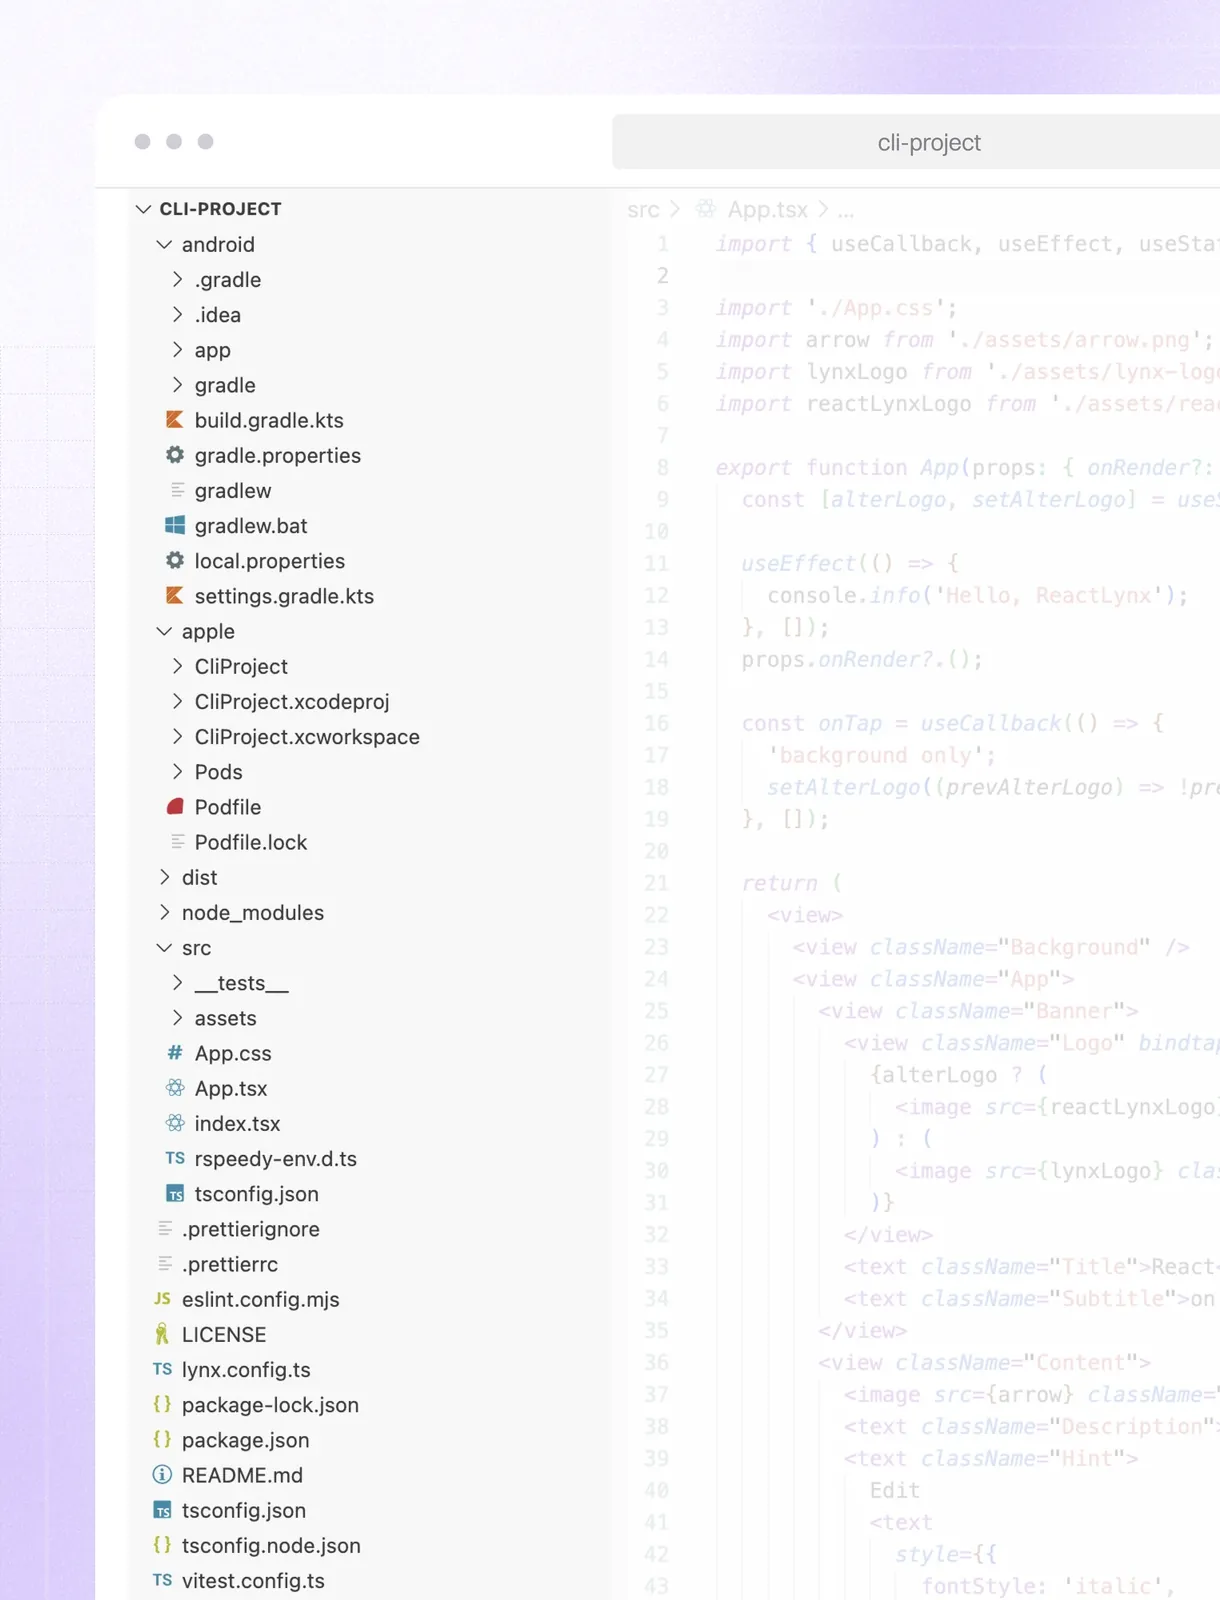
When you run npx create-lynxjs-app, it generates a complete project based on that template. The JavaScript layer (built with LynxReact) is already linked to native projects (as you expect in greenfield apps). You end up with a familiar layout: android and apple folders, a src directory for your JS code, and scripts for building and running the app locally.
The CLI doesn’t yet include commands like run-android or run-ios, but the generated projects open directly in your IDE and work right away.
What’s actually inside
The native apps generated by the CLI come from templates written in Swift and Kotlin. You can think of them as freshly created native projects that have already gone through the steps described in the “Integrate with existing apps” guide.
Here’s roughly what happens inside those templates:
- Configure and install Lynx native dependencies. The template includes all the required libraries and Gradle/CocoaPods setup.
- Initialize the Lynx environment. The app sets up the Lynx engine and prepares it to load JavaScript bundles.
- Load the JS bundle. In development, the JavaScript code is served from a local bundler; in production, it’s pre-bundled and loaded directly into the Lynx runtime.
- Create and render a LynxView. The main screen instantiates a
LynxViewcomponent and renders the app inside it.
So when the CLI finishes running, you already have a working native app that loads your JavaScript bundle and displays it through LynxView. It’s the same setup you’d create manually by following the integration guide, but automated and ready to run.
Running and developing your own Lynx app
Once you generate a project with the Community CLI, you can open it in Android Studio or Xcode and run it directly. The app installs on your device or simulator like any other native project.
In the project directory, start the bundler with npm run dev. The app connects to the bundler automatically; no copying and pasting of URLs is required.
With that flexibility, though, comes the usual native overhead. You now have to maintain and run full native projects. During our livestream, we ran into this problem firsthand: one of my Xcode setups could open and build the iOS app without issues, while another machine refused to cooperate. It’s part of the tradeoff: more control and flexibility, but also a bit more to manage.
From here, you can edit App.tsx or change the styles in App.css and see updates instantly. It’s the same development experience you get with Lynx Explorer: same hot reloading, files, runtime. The only difference is that you’re running everything inside your own native app, not the shared shell.
What’s missing in the CLI
The Lynx Community CLI is a big step forward, but it’s still early in development. It finally allows you to build a greenfield Lynx app with real native projects, although a few pieces are still missing.
There are no run-ios or run-android commands yet. You need to open the generated projects in Android Studio or Xcode and start them manually. It works fine, but it’s one step behind what we’re used to with React Native.
The CLI also doesn’t support Web or HarmonyOS targets for now. Those platforms are already part of the broader Lynx ecosystem, but haven’t made it into the CLI templates just yet.
Even so, it’s already a useful tool for anyone who wants to go beyond the default “Explorer” setup and try Lynx in a real native environment.
Two ways to start with Lynx
There are now two clear paths for working with Lynx. The first is the official getting-started flow, which runs your JavaScript inside the Lynx Explorer shell app. It’s quick, simple, and great for exploring the framework. You can see your code running in minutes, play with it, and get a sense of how Lynx handles rendering and updates.
The other path is through the Lynx Community CLI. It takes a bit more setup, but you get a full native project that you can open in Android Studio or Xcode. You own both the JavaScript and native layers, so you can build, debug, and ship the app like any other native project.
For quick experiments, the Explorer workflow is perfectly fine. But if you actually want to work with native code, test on real devices, and shape something beyond a demo, the Community CLI is the better choice. It’s where Lynx starts to feel like a real development environment, not just a playground.


Learn more about Cross-Platform
Here's everything we published recently on this topic.