In general, it is the way of designing products, devices, services for people with disabilities, but most of all it’s a way to provide equal rights and opportunities to everyone.
In terms of mobile apps, it’s enabling access to explore the world of mobile apps for people with disabilities or special needs, with the help of accessible design and assistive technology.
So who is accessibility for?
It's estimated that at least 15% of the world’s population experience some form of disability.
Let’s think, is there any reason to divide users into equal and more equal users? Absolutely not!
We have to get rid of the misconception that accessibility is rather voluntary than necessary.
We have to get rid of the presumption that the problem doesn’t apply to us. Maybe currently we have our eyesight and hearing in a good condition, but in a few decades, we can encounter some issues with reading the text or using the interface correctly due to limited mobility. Along with the dynamic development of technology, we should make one's contribution to that process so that in the future we can use it under the same condition without any obstacles.
The perfect app is an app that is accessible to everyone, so there is no doubt that supporting accessibility is your must-have. The fact that we are doing something good for all users and releasing complete product satisfies the most. Let's think about what else can motivate you to do this?
Accessibility benefits
Social benefits
Accessibility support is a step forward for the whole society. It's giving disabled people the opportunity to access day to day services as well as to become more independent, which also builds their confidence. It may also affect their involvement in participation in social life.
Positive PR
Diversity and inclusion efforts are one of the most important attributes of successful mobile apps in today's world. They also show that you care about every single user. Avoid claims of discrimination.
Reach and rating
Supporting accessibility means increasing user base to 100%. It also means more satisfied users which will result in better app reviews and ratings on the store.
What’s more, it also leads to more downloads from regular users as well. Improved brand perception and a broader marketing strategy can guarantee the overall success of the product.
Business
It's also about business, marketing campaigns, and being more competitive. Comparing 3 great apps on the market offering the same functionality, supporting accessibility may be a crucial point to encourage potential clients and investors to support the product/project.
You can significantly increase the revenue-generating potential of your apps by improving the accessibility aspect. Especially if you provide e-commerce apps or solutions based on a paid subscription.
Law
Providing accessible mobile apps is part of the law in some countries, which can open up some significant markets that otherwise would not be able to use your services or buy your products. Many countries have laws requiring digital accessibility, and the issue is of increased legal concern.
So what makes us skip this topic so often?
Most common oversights
Wrong design
The problem is often related to the design which is adapted to the default font and display size. Changing one of these options can affect in relocating items on the screen. Sometimes even a composition loses its sense. Discussing the pain points and edge cases with the designer before implementing it can be priceless.
Lack of experience
Developers are not enough experienced in supporting accessibility, nor in testing it properly. Together with wrongly prepared design, supporting accessibility becomes a complex task, especially for someone new in the industry.
Misconception
Clients prefer to think of accessibility as a cost, not as an investment, tending to focus on other features, app functionality. It is worth noting that it’s an investment not only in the product but also in programmers. The knowledge and experience they will gain will pay off in future projects.
Best practices for accessibility implementation
Remember that it’s not just a color
In general, the choice of the correct color, font and its size should be left to the UI designer. But if we can suggest some changes, it’s worth to remember some good practices:
Keep in mind that In accordance with the Web Content Accessibility Guidelines (WCAG) the background and foreground color should be contrasting enough to be both seen on monochrome screen and seen by people with limited color perception.
The contrast ratio should be no less than 4.5:1 where black and white have a maximum contrast ratio of 21:1.
It’s a wrong approach to rely mainly on colors to convey the important information or to distinguish certain elements. Additional text labels or icons can certainly be helpful in this situation so colorblind users can seamlessly understand it.
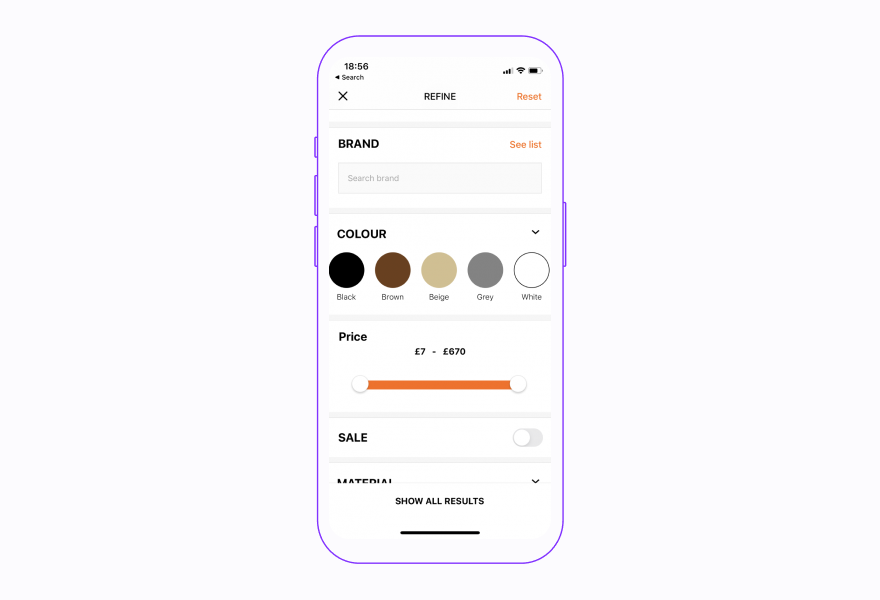
What’s more, for those who find it difficult to differentiate blue from orange or red from green, try to avoid these color combinations as the sole option to distinguish between two states or values. It is worth remembering it when your app is also presenting charts.
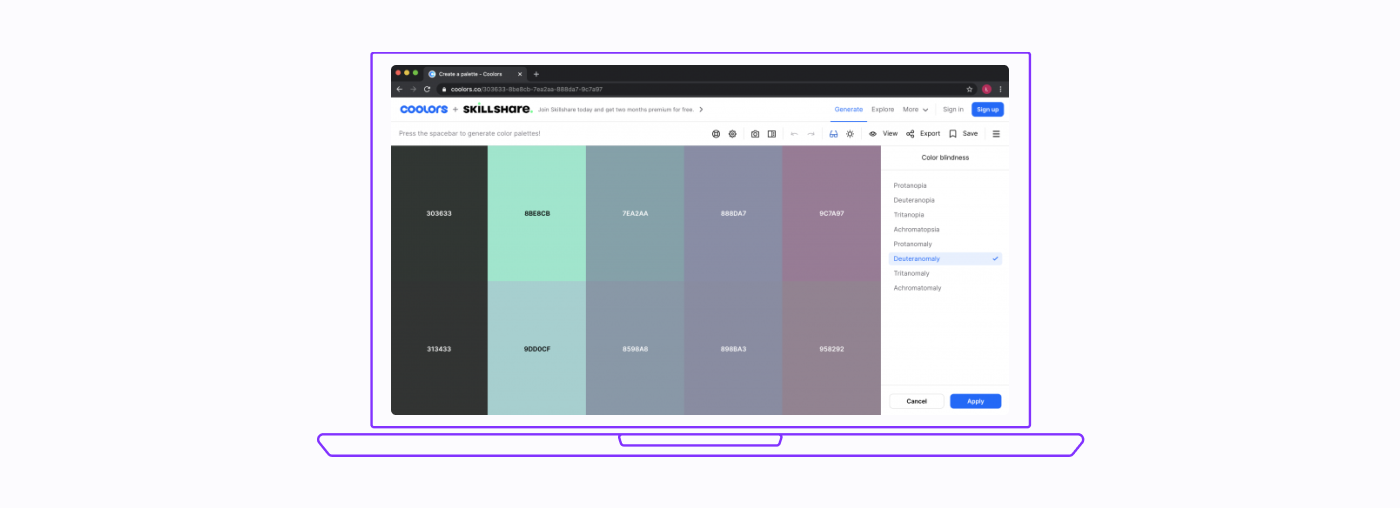
Use dedicated tools such as coolors.co website to make sure that the selected color palette is colorblind-friendly.
Strive for better text readability and perception
The goal is to make the text as readable as possible by choosing the right font, size, and weight. Try to use rather contrastive and bold fonts weight such as Regular, Medium, or Semi-Bold which are clearer and easier to read. Thus, avoid Thin and Light font weights which are regarded as difficult to read. Pay attention to the perception specifics of characters with a complex structure such as e, o, u, and a. Their shape should be clearly distinguishable.
Avoid or try to not overuse full text justification.hite spaces created by fully justified text can cause issues in the form of creating patterns that make it difficult for many people to read and focus on. The same applies to Italics and ALL CAPS which are great for occasional accent or highlight, but misusing these styles makes text again tough to read.
Like in the color section, here is also strongly recommended to add icons or glyphs next to some of the interface elements to enhance its perception.
Don’t disable font by scaling it in the whole app. The user sets a larger font for a reason and thus deprives the person of the ability to read the content easily. It would have been much better to limit the largest possible scale a font can reach.
Keep the layout simple and consistent
The consistent and unproblematic layout is desired especially by people with motor and vision dysfunctions, so we should give them an easier way to navigate and move between items as well as selecting them.
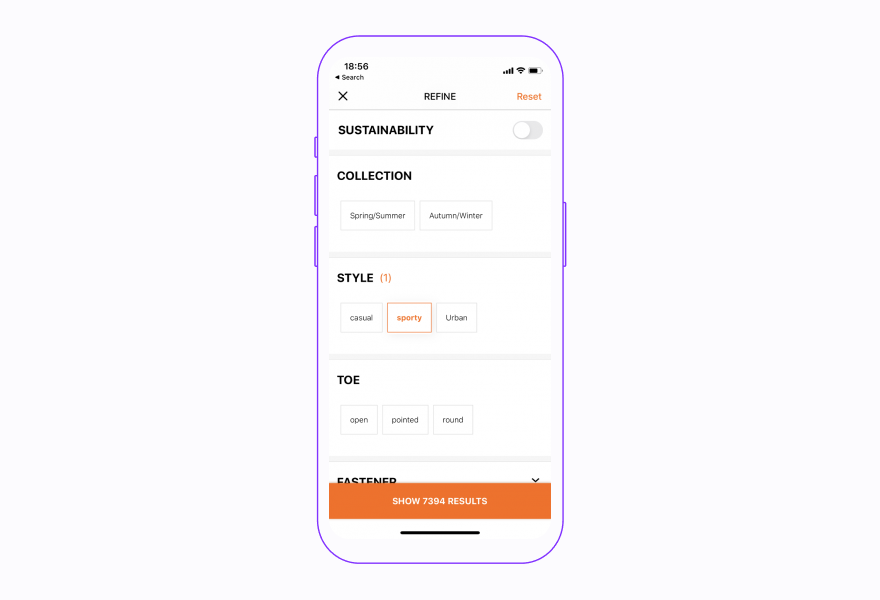
Let’s start with some important tip: you should know that blind people usually start from exploring the interface before making a decision. Because of that, it would not be appropriate to hide any element and display it when the specified condition is met. If it’s possible, you should rely on the component state (e.g disable button instead of hiding it) and keep it always on the interface.
Locate elements with the most important functionalities such as action buttons above the other ones. For example, create a sticky footer to avoid scrolling to perform the action. Moreover, do your best to place them always in the same position to keep the consistent composition, regardless on phone layout (landscape or portrait).
Let’s stay with the buttons. It’s important to provide target space large enough to be clearly visible and easy to tap. To make it comfortable for a user to tap a certain element, it should be min. 44px tall with enough free space around it.
It’s good practice to divide a content for several screens instead of packing it tightly . It makes it easier to navigate between elements when screen reader is enabled. Consider this especially when creating e.g. registration forms. Thanks to this solution, moving into incorrectly filled input will be more efficient.
Testing doesn’t have to be hard
Mostly, you are going to test how the application looks at the largest font and how it behaves when the screen reader is turned on or reduce motion is enabled. Luckily, all of these options are gathered in one place in the Accessibility tab under the Settings on both platforms. However, on iOS screen reader (VoiceOver) is available only on a physical device. On Android situation is more friendly, because testing accessibility without a physical device is not an issue. Admittedly, the Android emulator doesn’t have the screen reader (TalkBack) app installed by default, but it’s to install. You can download Android Accessibility Suite from Google Play or download <rte-code>TalkBack.apk<rte-code> file and then drag it on a simulator.
Don’t worry, you can still test your app (except VoiceOver) on iOS simulator. Accessibility Inspector tool available via Xcode app can be really helpful in that process. It allows you to inspect if all of the accessibility properties that are available are accessible. Also, it will help you in testing different input devices such as Braille keyboard.
Another tool, which is dedicated to Android and can be handy in the testing process is <rte-code>AccessibilityScanner<rte-code>, available on the store. That app scans the current screen and displays some tips on how to improve the accessibility level of it.
Get familiar with the available gestures that allow you to control the device and applications when the screen reader is turned on. You can check them on the official Google and Apple support websites. However, if something is unclear, I encourage you to also check their YouTube channels.
Don’t change platform-specific behavior
Each platform has its own specificity, which means that some components may behave differently and we should respect it. We should not interfere with the user's habits related to screen reader messages and what's more, we shouldn't overwrite them. To illustrate it better: if we create a custom component that behaves like a switch, let's make sure that the screen reader presents voice-over messages in the same way as if it were a system switch.
How to approach accessibility implementation in React Native apps?
Work on accessibility should begin with getting familiar with the four most important principles of accessible design provided by Web Content Accessibility Guidelines which I’ve partially described in the best practices part. These principles are intended to ensure and facilitate the use of technology and are based on the needs of people with different kinds of impairments.
These principles describe that accessible technology should be:
Perceivable so both content and interface elements must be clearly visible and easy to perceive.
Operable so interface elements are easy to access. It means that they have to be large enough with proper spacing and fully compatible with gestures when screen reader is enabled.
Understandable - all the messages and operations that can be performed must be understandable with keeping consistent and supporting
multiple orientations layout.
Robust - means maximizing compatibility with current and future assistive technologies or tools, but also facilitating the data entry process.
After such a large dose of theoretical knowledge, it's time to explore your application.
I think that you know your user base and understand their needs. It is crucial to properly implement accessibility. Take, for example, an application to learn a foreign language that contains lessons in the form of short dialogues. In this case, it is necessary to add a transcription.
Another example presenting how to improve your product can be the messenger application, which is mainly used for text messaging, but I think it is worth to add voice messaging options for blind people.
Identifying opportunities and checking what can be improved is individual and depends strictly on the application. But, to do it right, you need to carefully inspect your app to know what needs to be corrected. I recommend you to do that in several stages.
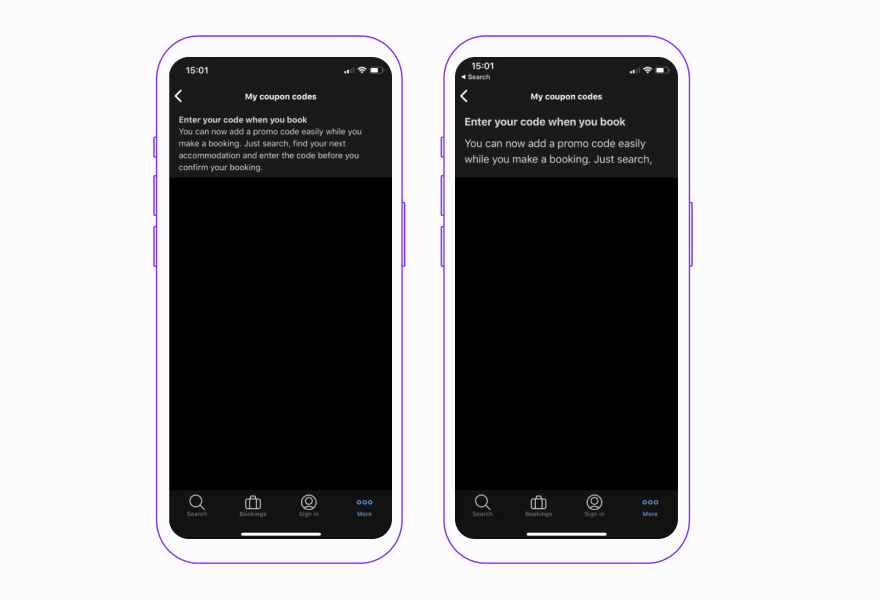
First, examine the content visually and make sure that texts are correctly formatted and colors are user-friendly. In the next step set the largest fonts along with the largest display size and confirm that composition keeps its sense and is still functional. Pay attention whether anything remains-off the screen or it’s partially cut or if the content is scrollable on every screen.

I recommend testing it on devices with an 18:9 (or 18,5:9) aspect ratio, because they provide a taller screen with slimmer bezels on both sides. It is worth having a UX designer who will help with any difficult situations and will support the developer.
The last step is to enable screen reader and inspect all the interface elements. At that point, you should confirm that each component has its role and its functionality is exactly the same as when the TalkBack or VoiceOver is disabled. Furthermore, pay particular attention to whether the responsibility of each element is clear and whether it doesn’t need to be supplemented with additional hints.
Dive into the code
React Native provides well-developed accessibility APIs that are constantly being developed and allow you to create inclusive mobile applications easier. You should focus on getting familiar with the most important properties such as <rte-code>accessible, accessibilityLabel<rte-code>, <rte-code>accessibilityRole<rte-code> or <rte-code>accessibilityHint<rte-code>. Each of them has a unique role and a specific function. These properties will help users to understand what kind of item they have selected and what will happen when they perform an action.
The next handy tool you should be familiar with is <rte-code>AccessibilityInfo<rte-code>. That module is extremely useful for listening to screen reader status changes or to detect whether reduce motion is enabled. What’s more, it exposes methods to programmatically set accessibility focus to a specific element or announce a message when screen reader is enabled.
Plugin eslint-plugin-react-native-a11y may simplify maintaining the code quality and support in identifying places in the codebase that are missing additional accessibility properties. Rules gathered there detect a few of the most commonly made accessibility issues found in react native app. Let’s assume that buttons in your codebase have only <rte-code>accessibilityLabel<rte-code>. It’s fine, but it might be better if they had <rte-code>accessibilityHint<rte-code> as well. In that case, the plugin will indicate places for improvement printing an error saying:

It is worth checking if components that are not accessible in your application have their native equivalent. Generally, it’s always better to use components based on native ones not only because of better performance, but they are also supporting accessibility by themselves and you will save some time. However, if your design indicates a custom solution, make sure you add accessibility to the component according to the platform-specific requirements.
Before adding a component library into your codebase, make certain if it’s supporting accessibility that will also improve your work. I recommend using the react-native-paper library which meets all the requirements described above. It’s fully compatible with screen readers, readability tools, and right-to-left languages, so it makes your app inclusive by default. Moreover, it’s following a Material Design best practices.
In the last point, I would like to sensitize you most of all to how the screen reader reads all kinds of acronyms, especially the ones that can also appear as regular words. These situations particularly apply to medical or business applications. In such cases, it’s a good practice to interject whitespace between characters. You can check my previous article where I described how to do it correctly.
Testing accessibility in React Native apps
You already know how to test the RN app, but my goal in this section is to give you some tips on how to keep it right.
In my opinion, manual testing gives a better perception of the application in the context of a disabled person. Therefore, start from a file in your repository which will contain test cases for manual testing. In the test steps, describe how to get to the tested item, what should be tested within a component, and what do you expect from it. Then divide your application into several parts and assign each developer a section to test. Perform this testing once a month and rotate the sections each time so that each developer will check something different every time.
Thanks to such approach, after several rounds of testing, the developer will return to the first section and will be familiar with the entire application, which should also reduce the time needed for testing.
In order to not miss the accessibility in new features, create PR template which will contain the following checkpoints:
- tested accessibility in the PR
- added/updated accessibility test cases.
Another option is to request dedicated companies for an audit, where your app certainly will be tested by a person with disabilities. During the audit, the application will be tested against the widely accepted WCAG 2.1 guidelines. As a result, you will receive insights where are the gaps that must be corrected with some suggestions based on expertise and best practices. However, if you focus on the strong growth of your developers' team, it’s worth thinking about an accessibility workshop.
There are many solutions, but you have to find the right one that suits your needs and budget.
Conclusion
Accessibility is what you need to have in the mobile application to satisfy 100% of users, release the perfect product, and, what's the most important, ensure equal rights for everyone. Presented benefits clearly indicate that accessibility is an investment that will be beneficial in many areas, but yet that feature is often overlooked and treated as a cost. However, the implementation and testing process doesn’t have to be difficult if it’s well planned in advance and then properly maintained.
Our React Native development company offers a wide range of services, you can check all of them in the services section.

Learn more about Accessibility
Here's everything we published recently on this topic.