Setting up React Native Monorepo With Yarn Workspaces

A monorepo is a single repository that holds a multitude of projects with all their code and assets. While the projects can be related, they can be used independently by different teams.
Working with monorepos is very useful, especially when developing big and complex applications like super apps. Monorepos enable sharing the logic between a web app and a mobile app, for example.
In this article, we’re going to set up a basic structure for a monorepo in React Native.
Why use monorepo in React Native?
Thanks to react-native-web we can share every component so there’s no need to duplicate the code many times. This means easier dependency management, shorter CI times, and better collaboration between teams since the code can be shared.
The main advantage though is the possibility of sharing packages between React and React Native. Most of the time we decide to share only business logic, but thanks to React Native Web, we can also share some of the UI components.
Setting up Yarn workspaces
While setting up a monorepo, we have two options: we can either hoist the packages to the root level or prevent them from hoisting. Yarn workspaces have an option named nohoist which allows us to specify packages that aren’t hoisted. It depends on your use case but most of the time it’s better to hoist packages to the root level.
Alternatively, you can use npm workspaces, it should work the same.
Why it’s better to avoid using nohoist
Preventing packages from hoisting takes back the main advantage of monorepos which is sharing node_modules between repositories. When nohoist option is turned on, most of the time packages are duplicated inside the root level node_modules and inside the project level node_modules. Downloading packages multiple times can lead to longer CI/CD runs and higher costs.
Rearranging the project structure
In order to set up yarn workspaces, we need to restructure our project to suit the structure below. Projects need to be divided into separate folders and we should have root level package.json
Next, you should create a package.json file in the root directory of our project with this command: $ yarn init -y
It should look like this:
Note that private: true is required because workspaces are not meant to be published.
In the workspaces section, we define a work tree. We can pass there an array of glob patterns that should be used to locate the workspaces. So in the example above, every folder inside packages is defined as a workspace.
Creating a React Native project
Use command below to create a React Native project inside the packages folder:
In order for our app to work in a monorepo structure, we need to make sure that config files are pointing to the root level node_modules due to package hoisting.
iOS setup
- Change paths at the top of your Podfile
- Regenerate Pods, by entering the command below in the packages/mobile folder:
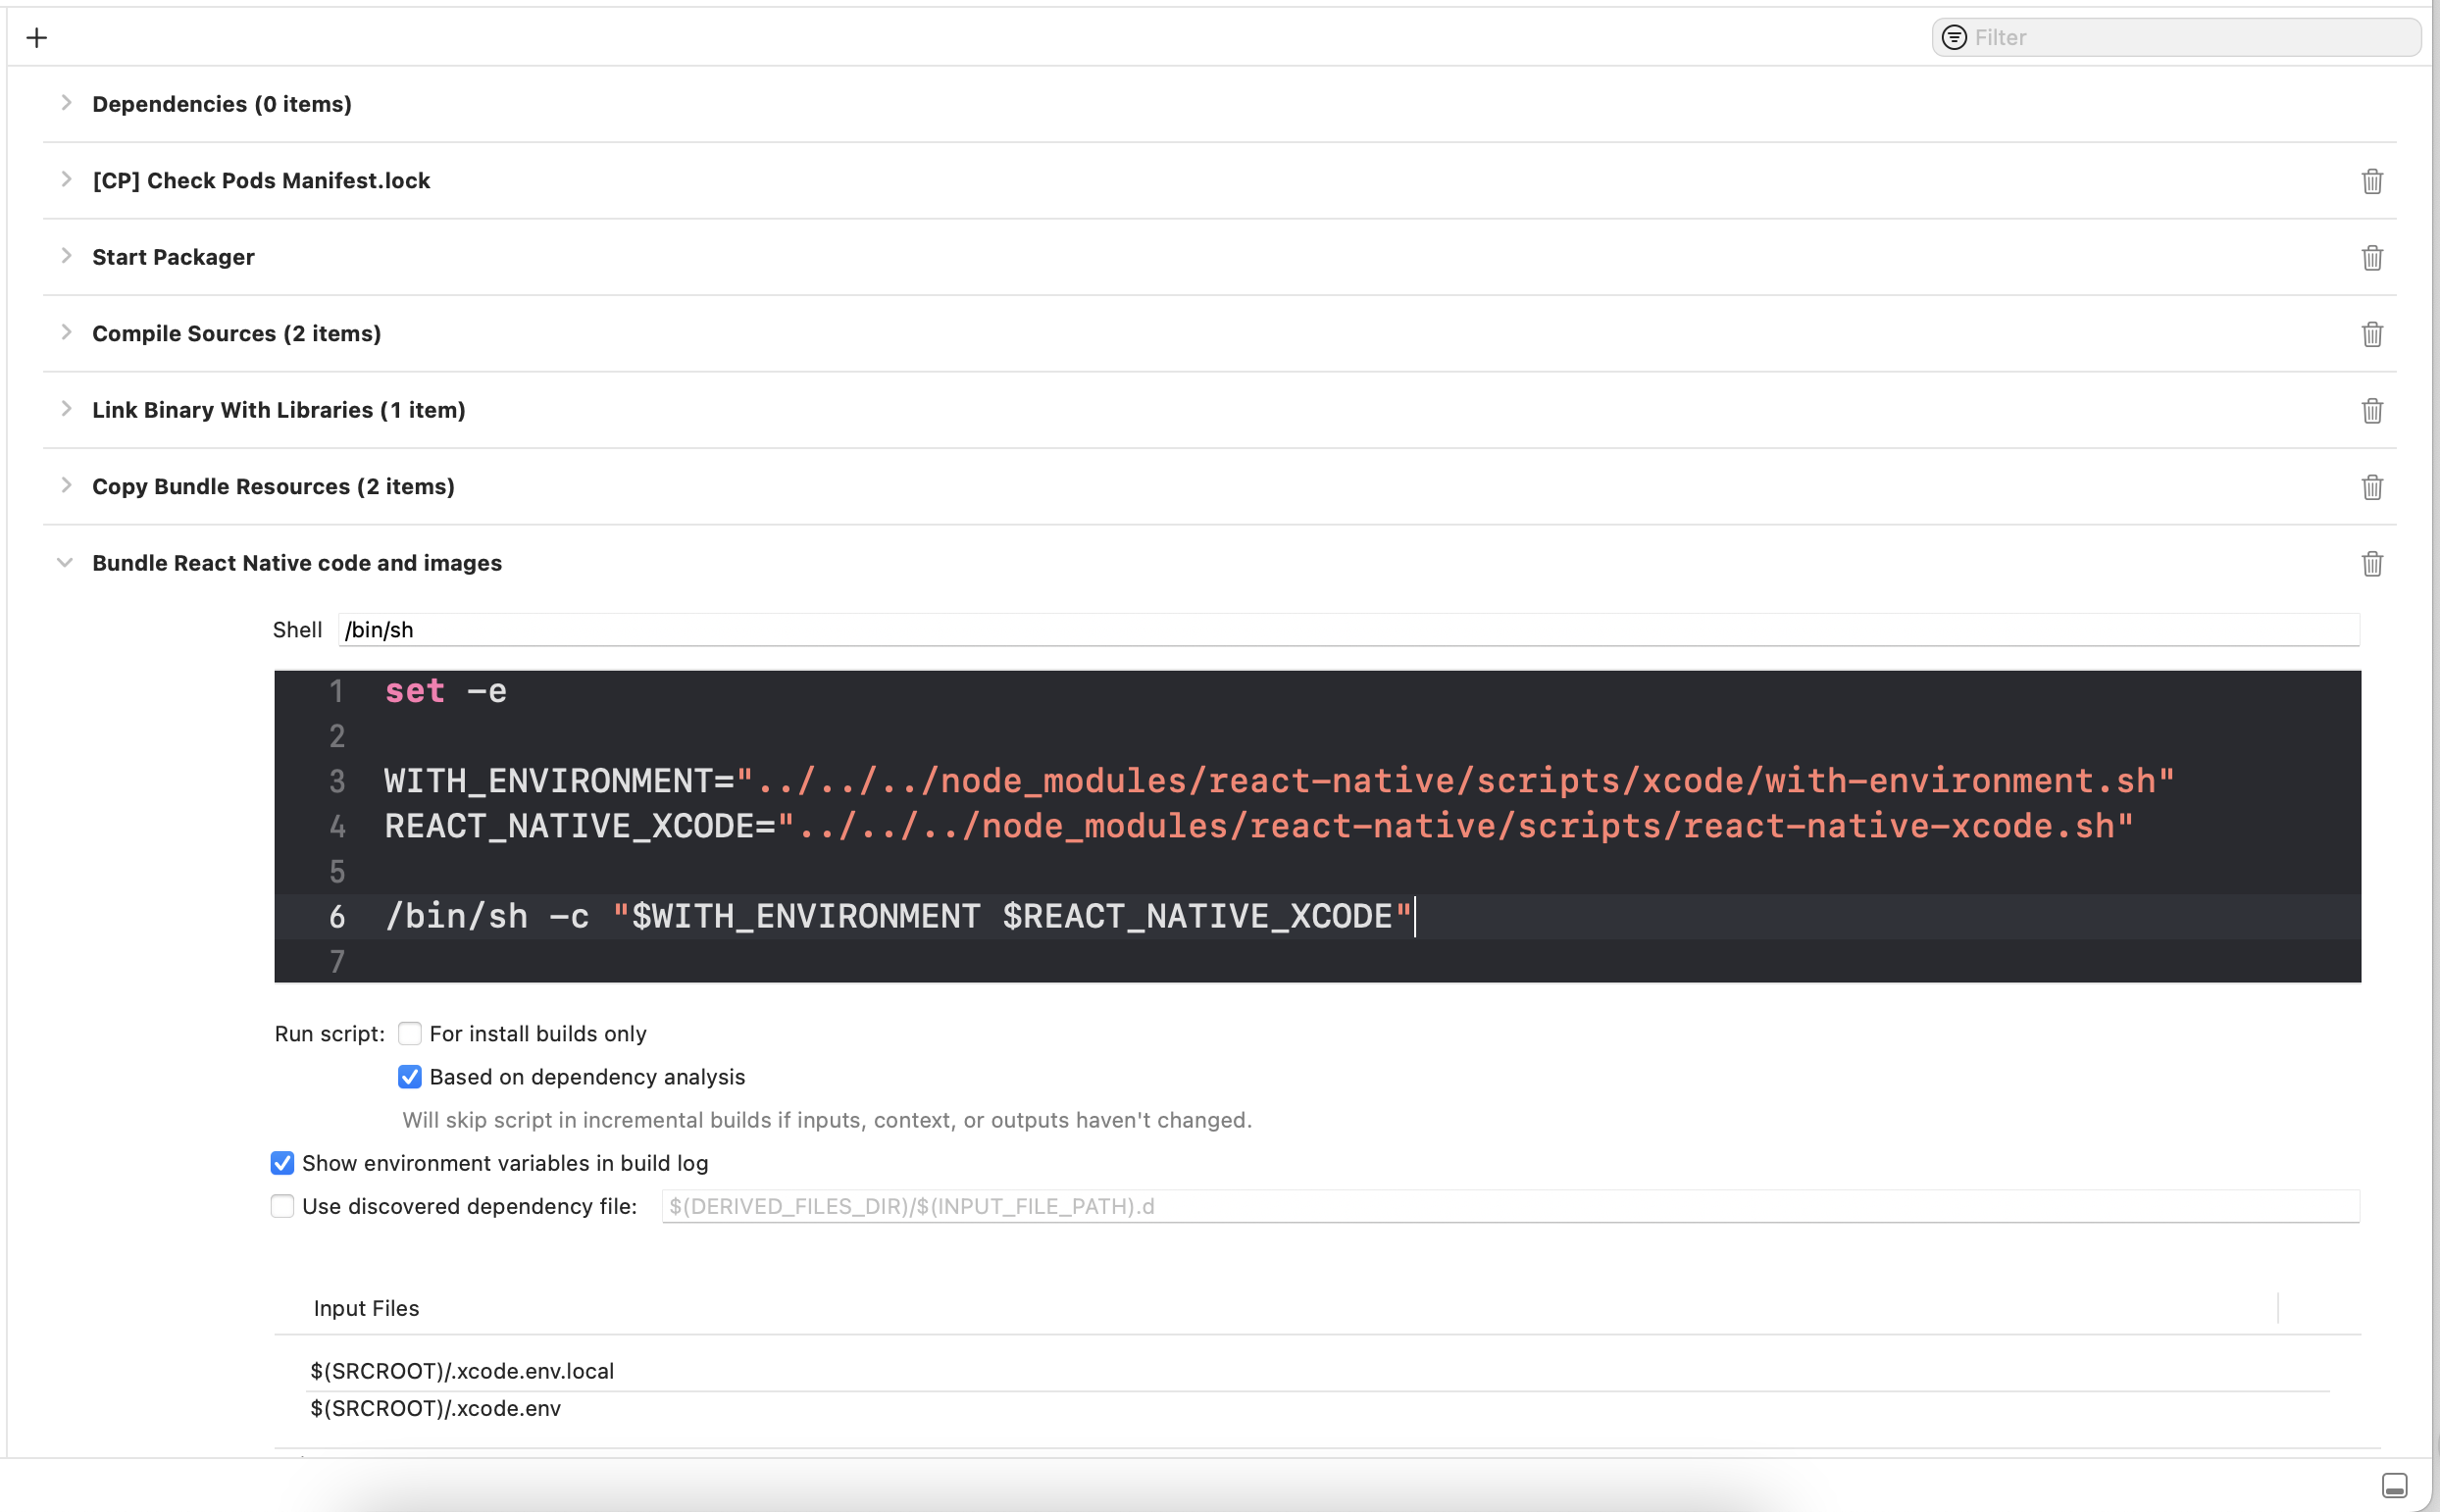
- Next open Xcode and inside Project settings > Build Phases open “Bundle React Native code and images”
Change the path of the script:
It should look like this:
Android setup
React Native ≥ 0.71
Uncomment the line with reactNativeDir and point it to root node_modules
In top-level build.gradle add this:
and inside: packages/mobile/android/settings.gradle
React Native ≤ 0.71
- Fix paths inside packages/mobile/android/build.gradle
Change url of the React Native Android binaries, and Android JSC in the allprojects section:
- Fix packages/mobile/android/settings.gradle
Here we also need to change paths to the root node_modules folder.
- Next go to packages/mobile/android/app/build.gradle
Inside the project.ext.react we need to add property cliPath so it will override the default location of the cli.
In the same file, change this line: apply from: "../../node_modules/react-native/react.gradle" to point to root level node_modules as well.
And also change: inside packages/mobile/android/app/build.gradle
If you are using or planning to use the new architecture, we also need to change a few lines in the isNewArchitectureEnabled() if statement**.**
Configure Metro
We’re almost done with setting up the project. The last thing in the React Native app is to add watchFolders so metro knows where the linked node_modules are. The shared modules are symlinked by Yarn, and Metro started supporting symlinks from version 0.75.1, effectively being shipped with React Native 0.72. If you want to turn on symlinks right now, you can pass the experimental flag to your metro config:
Regardless of whether you are using symlinks, metro still requires us to list symlinked modules in the config, but this might change in the future. You can follow the discussion on GitHub.
Setting up a shared package
To keep it simple, we’re going to share only one function across React Native and React.
Inside the packages/shared, create a new package.json file with the command:
The shared library is in typescript, so we need to set up a build step with the typescript compiler (tsc).
The build step uses rimraf which is a small utility for node that allows us to remove a folder, and then build the app with tsc.
postinstall indicates that our shared dependency will build automatically after installing.
Note: The package name is really important, because it will indicate from where we will import our module.
It’s also important to add all packages and keep the exact same version used in a shared project and target projects.
Next we need to configure tsconfig.json where we can define our build settings.
Here is an example config file:
Next, let’s create an index.ts file inside the packages/shared folder.
Run this command to build the package:
Next, we need to add this package as a dependency in our react native project. So inside packages/mobile/package.json add @example-app/shared as a dependency.
Note that the version of the package must match the version specified inside packages/shared/package.json. Previously we defined that @example-app/shared version is 1.0.0.
And also inside the metro.config.js
Now, run this command in the root directory, so yarn will set up symlinks for your shared package.
Right now we should be able to import the add function inside React Native app.
Setting up a React project
In order to set up a React project, execute the command below inside packages/web:
Add @example-app/shared dependency:
And we can import and use the shared package:
Sharing UI components with React Native Web
In order to share UI components, we need React Native Web which provides a compatibility layer between React DOM and React Native.
Installation steps
Install react-native-web:
Install babel-plugin-react-native-web
Modify shared package to export React Native component
First inside packages/shared, create a new file called TestComponent.tsx
Next export it from the index.ts file :
Rebuild the shared package inside packages/shared folder:
And now we should be able to use TestComponent inside a React app.
To sum up
Setting up a monorepo can be tricky, but it pays off in the long run! You can easily share all of your code and assets between React and React Native.
Using a monorepo is growing in popularity - there is even an open proposal to migrate react-native repository to monorepo. Find out more about React Native monorepo on github.


Learn more about Developer Experience
Here's everything we published recently on this topic.