In the first part of this quick guide, you could learn how to prepare for testing your apps in the cloud by the following steps:
- The idea of testing React Native apps in the cloud,
- AppCenter configuration,
- and Test Run configuration.
Now, we will describe the testing process itself.
In this part, you'll read about:
- Creating XCUITest suite,
- Submitting the app for testing,
- Checking the results,
- and Writing the actual test suite.
Now, let's dive into testing!
Creating XCUITest suite
Before we begin and write our first actual test, it is best to upload the application to the cloud and see if everything works as expected.
That’s why, instead of writing a custom test to verify our React Native component, we will create an empty UI testing target from within Xcode. Such a target, as always when created with Xcode, will include a simple test case by default.
To create a new target, choose “Editor” -> “Add Target” and choose the following:
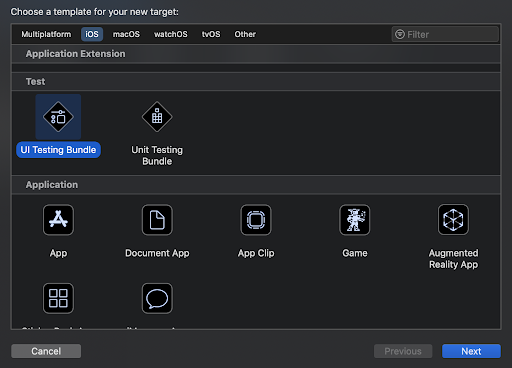
When selected, press “Next” to navigate to the next step.
In this section, you have to give your new target a name and define some additional details. It is up to you to give your target a name and identifier. For reference, please find our choices below:
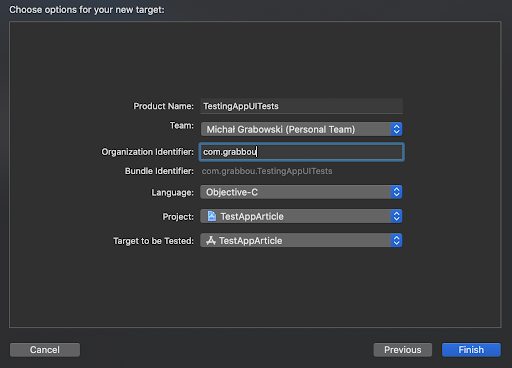
When ready, press “Finish” and a new testing target will be added to your application. If you open a newly created “TestingAppUITests/TestingAppUITests.m,” you will see a basic test suite with a single test.
The name of the file where your tests are located may be different - depending on the name you have entered in the previous step. Keep that in mind when looking for a TestingAppUITests.m file.
We will use that placeholder to test whether AppCenter loads and tests our application properly. When we pass that step, we will move to the next one - writing a real-world test case.
Submitting your application for testing
Before we begin, we need to make sure that we have the necessary tools installed locally or on the CI if that’s the context we’ll be running things from.
In reality, just make sure you have Node (at least 6.x, but since React Native requires 8.x or newer, you’re good to go) and AppCenter CLI.
It is very likely that we haven’t installed it so far, it is a good moment to do it now:
Installing AppCenter CLI will give us a lot of additional options.
Now that we have configured everything, we are ready to submit our application for the tests to run in the cloud. To do so, we will be following steps in this guide, which is an official document.
Go to your iOS folder inside your project and run:
Make sure to replace the “TestingApp” with something different in case you used your own name.
If you were following our article line by line, it is likely that this command failed with the following error:
This error indicates that we need to choose a development team - otherwise we will not be able to build our application. To do so, we will open Xcode and go to “Signing & Capabilities” editor, as prompted by the error message.
Make sure that you choose something from the “Team” drop-down menu. If you’re working on your own, it should be a “Personal Team” most of the time. When doing work for a client, you may want to choose your organization (at Callstack, we have a dedicated one for client work).
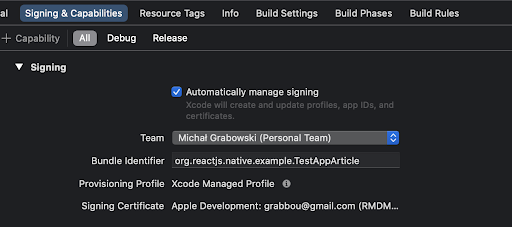
Xcode will automatically manage to sign if you choose appropriate settings.
When you choose a team, Xcode will automatically register the application and fetch the necessary certificates. The above image shows how things should look like when everything was resolved successfully.
We can now run our “build” command again and wait for the final result. The command should take a while when run for the first time. Don’t be surprised if you see the output from Metro in there as well.
When completed, it should print “** TEST BUILD SUCCEEDED **” at the end and generate a special “DerivedData” folder that contains the application.
Now that we have successfully built the application, we can upload it with the following command:

This command should be automatically displayed to you in the “3. Submit” section.
Thanks to that, it would have the “app” and “devices” options already filled in with the data that you have entered before.
You can find a written version of that command below:
Running this command will package the application and the test suite and send it directly to the cloud.
When completed, you should see an output similar to the following:
That means your test has been successfully uploaded and is now being processed in the cloud. While you can keep the command running to see the results in the terminal, we can now go directly to the AppCenter console to see our test results online.
I have run into issues running the appcenter test run command with Xcode 12 installed. There seems to be an issue with the latest Xcode version that the AppCenter team is investigating as we speak. For now, the best workaround is to have Xcode 11 installed in parallel and use it for that particular task.
Looking at the results
When you go to appcenter, you should see the test that you have started in the previous step.

If you have visited the console just seconds after running the CLI command, chances are the status is still going to be “Validating,” just like when you run your command. After going into the detailed view of a particular test, you should see information on the progress of your test suite.
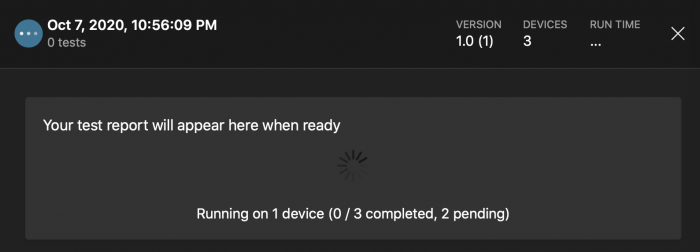
In our case, the AppCenter just started running them and is testing on the first device out of the three that we have registered earlier in this article.
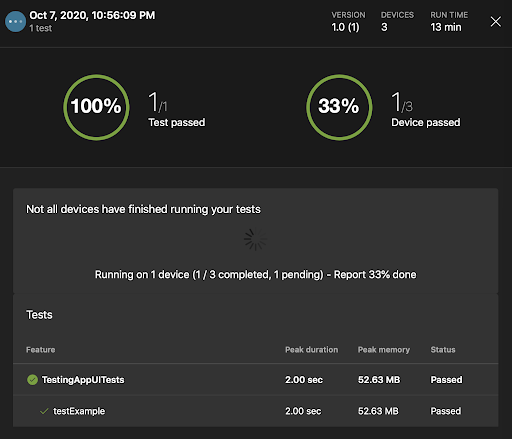
As per the information in the UI, the results will automatically appear in place of that disclaimer the moment the test finishes running on a particular device. For example, the above screenshot demonstrates the intermediate state of our test suite after running on just the first device.
Writing actual test suite
While our tests have passed, they didn’t actually test our React Native application just yet. The default built-in test suite that we have created in the previous section Creating XCUITest Suite is a really simple placeholder that passes in all scenarios, as long as your application launches successfully.
Wouldn’t it be great to verify that certain React Native components are printed on screen? In this section, we will quickly cover the basics of doing so.
Keep in mind it is a universal paradigm that translates well to other testing frameworks. What we’re going to show here for XCUITest will be very similar to Appium and others.
To begin, we need to change the scheme from Debug to Release. Go to Product -> Scheme -> Edit Scheme and choose Release from Build Configuration.
The reason for that is simple. In Debug mode, the React Native application will load your JavaScript bundle from Metro and will do that asynchronously. In other words, your XCUITest suite will think the application finished loading, where in fact - the JavaScript code is still being fetched. As a result, all your tests will fail as the testing framework will be unable to locate your elements.
It is possible to teach your XCUITest to wait for React Native to load, but doing so was out of scope for this article. We may cover that in the future.
We can now open TestingAppUITests.m and get familiar with basic controls when it comes to running tests locally. It will help us in debugging and writing our test cases before they’re submitted to the cloud.

The most important thing here is the little indicator next to every test suite. It can be grey (test did not run yet), green (success), and red (failure). You can press it and Xcode will run your test. Do it now, and it should turn green.
Now that you have a green indicator, we can begin working on our actual test. To write your first assertion, you have to locate your React Native component. The easiest way is to find it by its accessibility label.
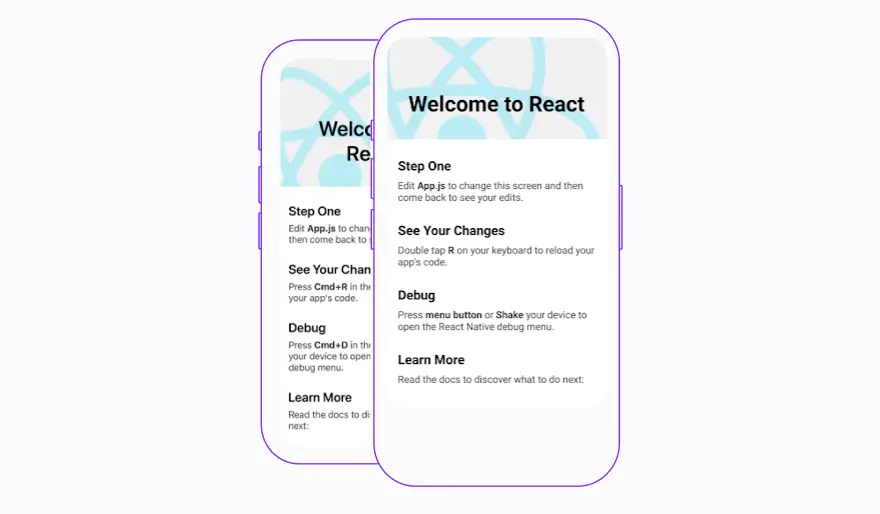
In our test, we will try to find that “Learn More” text is printed on the screen. Let’s open our “App.js” file and place “accessibilityLabel” on the component.
Now, we can go back to our TestingAppUITests.m and add the following test suite:
First, we locate our text by accessing app.staticTexts and using our accessibilityLabel to retrieve the particular element we’re interested in. Next, we assert that the element with XCTAssertTrue making sure that the existing property is true.
Run your test suite once again and you should see that your tests are green. You can now go back to the Submitting your application for testing section to resend it again. The AppCenter test should have a success indicator as well.
Since this article was focused more on setting up the AppCenter itself, we didn’t spend much time writing advanced test suites to test our React Native application. This is something that we will work on in future articles. If there is a particular scenario that you’d like us to cover, please let us know!
For further reading, visit AppCenter and XCUITest documentations.
Summary
Testing in the cloud can be really helpful. It can lead to much better test coverage by letting you execute your integration tests on real devices, reassembling different production environments.
The AppCenter itself is really easy to set up and most of the time, it guides you through everything you need to do.
While it doesn’t support Detox at the time of writing this article, we hope that articles like this will drive more React Native developers towards using this amazing feature and bring some attention to the AppCenter team around implementing first-class Detox support.
Meanwhile, if you want to test your application in the cloud on many devices, you need to use one of the supported frameworks and write your test either in Java or Objective-C. If that’s something you don’t feel comfortable with, feel free to reach out to us, our team at Callstack will be more than happy to help.


Learn more about Testing
Here's everything we published recently on this topic.