Setting Up Notifications With AWS Amplify Gen 1
Exploring live messaging and push notifications led me to AWS Amplify—a robust service with all-in-one features that's been on my radar. However, I found the setup process frustrating—clear, step-by-step guides are scarce, and the documentation can be overwhelming.
To help others navigate this, I’ve put together a guide for integrating Amplify with React Native, focusing on Android. If this resonates, I may follow up with an iOS guide.
Setup Process
Here are the steps to take:
- Set up IAM user for local development and initialize Amplify on the local machine
- Create a project with Amplify
- Add authentication via AWS
- Add notifications
Set up IAM user for local development
First, we will need to create an AWS profile; after that, we will start our deployment. You can register at the AWS console.
After verifying your account, you will be in the AWS console. Once you are, go ahead and install Amplify locally:
npm install -g @aws-amplify/cli
Resolve EACCES permissions when installing packages globally with npm if needed.
Next, we need to configure our user using the following command: amplify configure.
You should be redirected to your account and the IAM account section. If not, follow this link.
Here are fully described steps on how to set up a profile for local development.
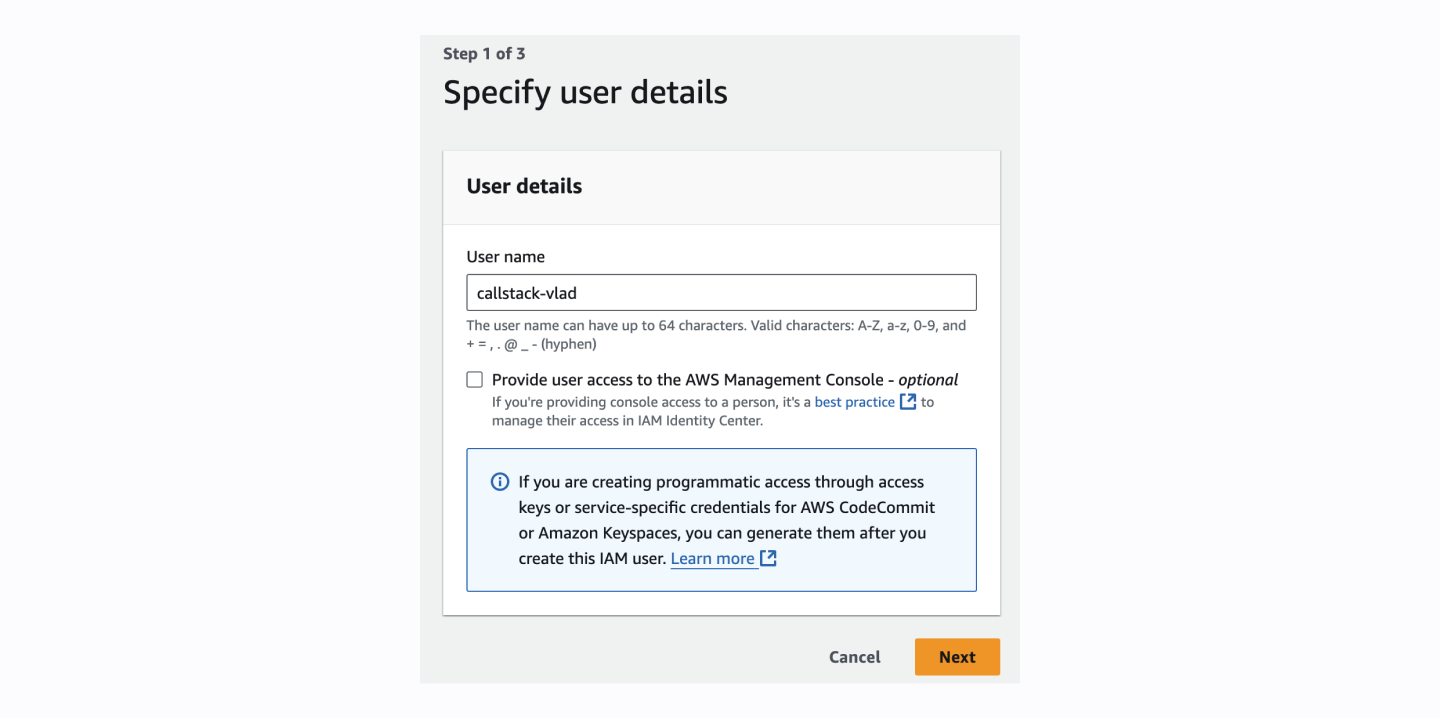
Step 1
First, you will be prompted to choose a name; choose the one that is easiest for you to remember.
Step 2
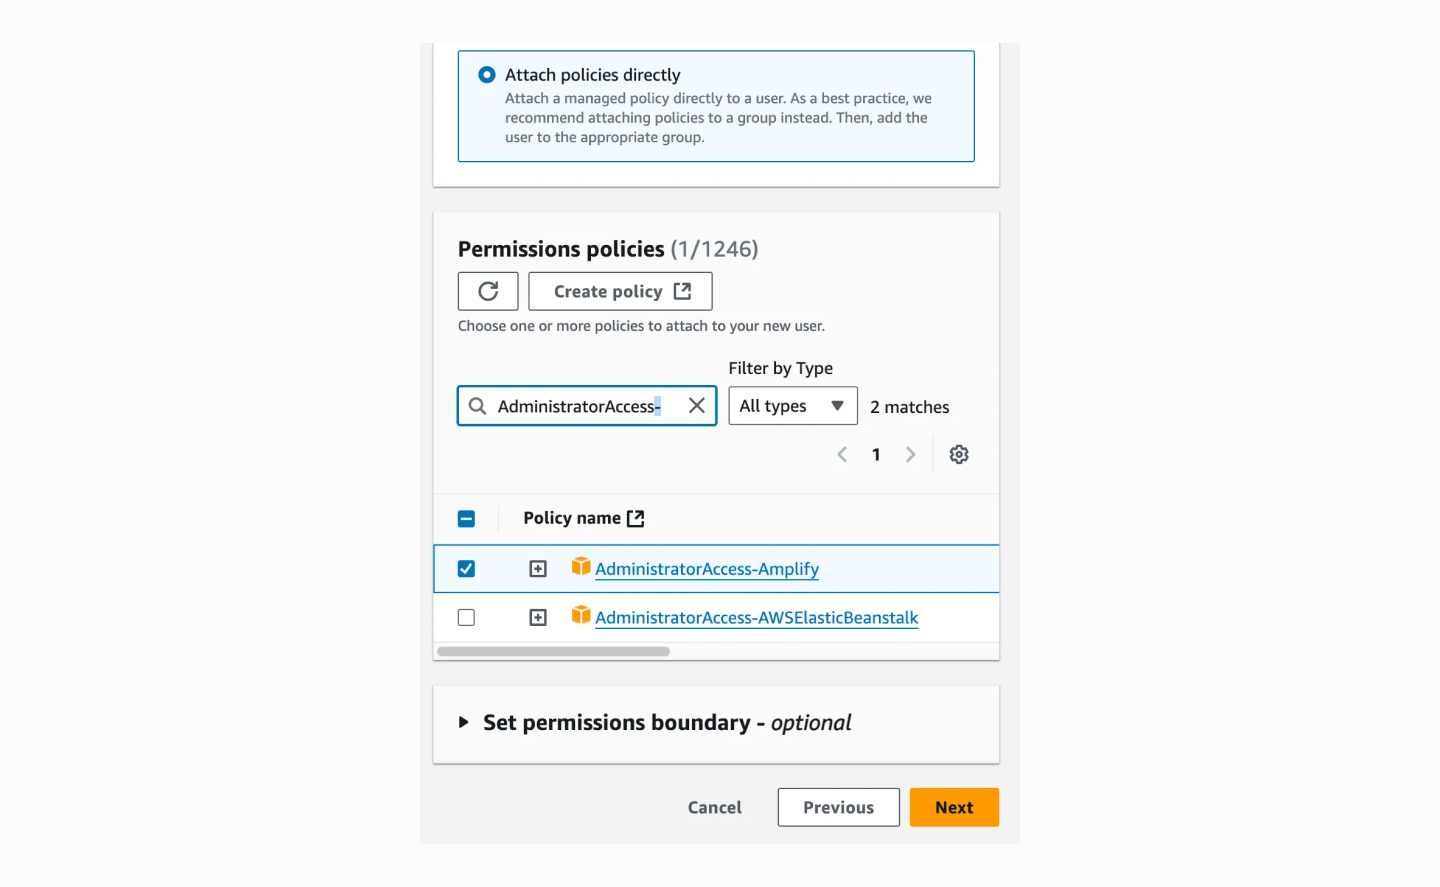
Decide which accesses to give to this user. Note that we only need one AdministratorAccess-Amplify permission.
Step 3
After that, we can see the details of the user we are creating. It will look like this:
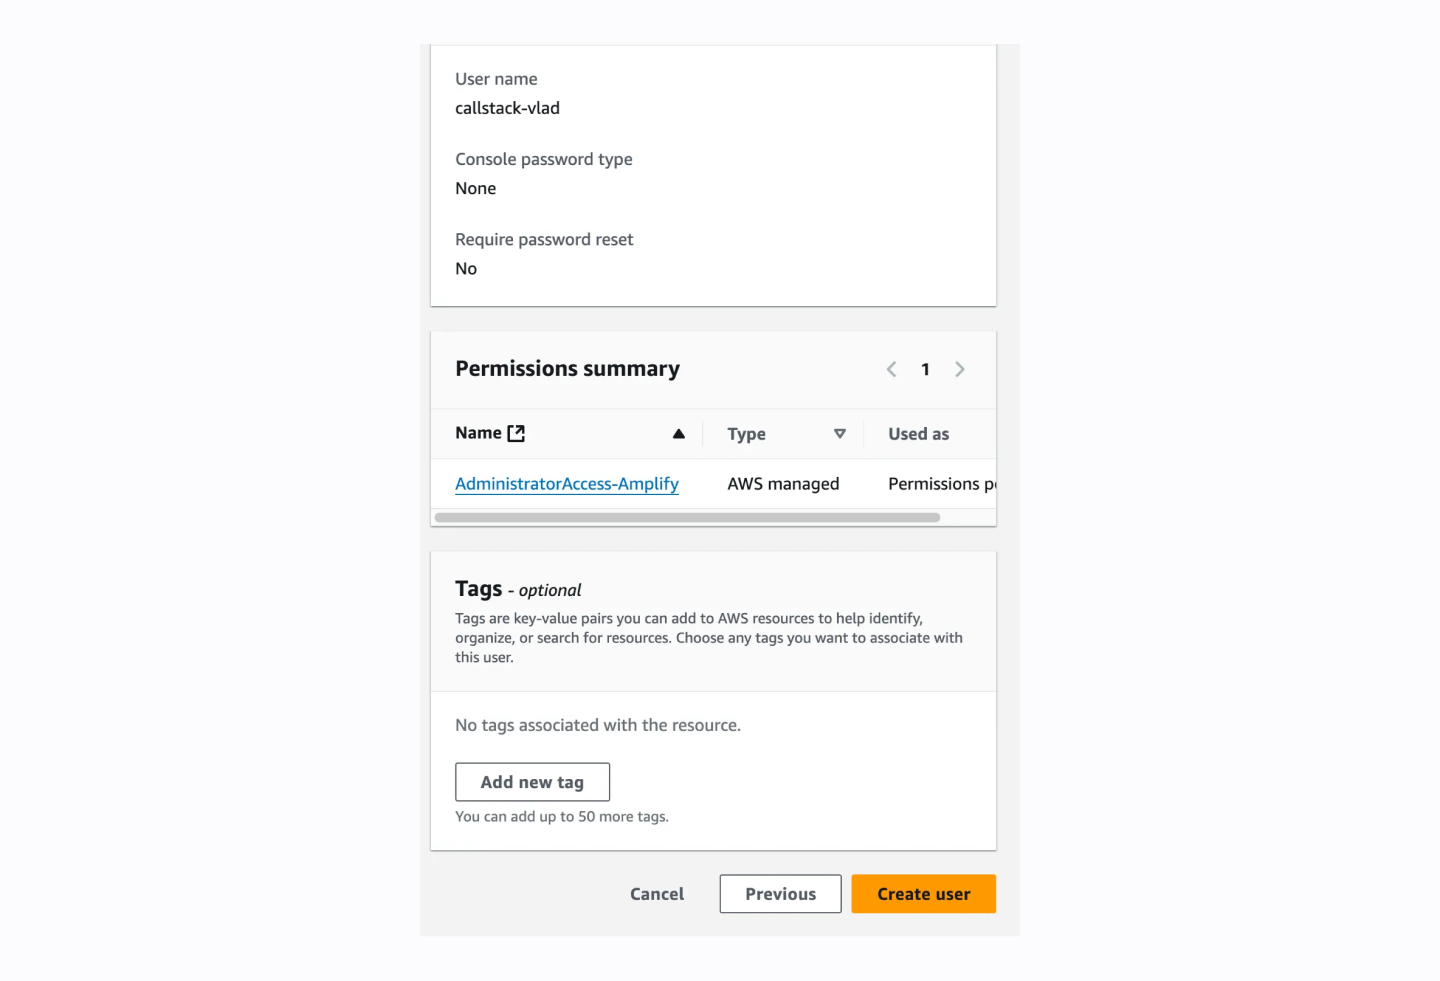
Step 4
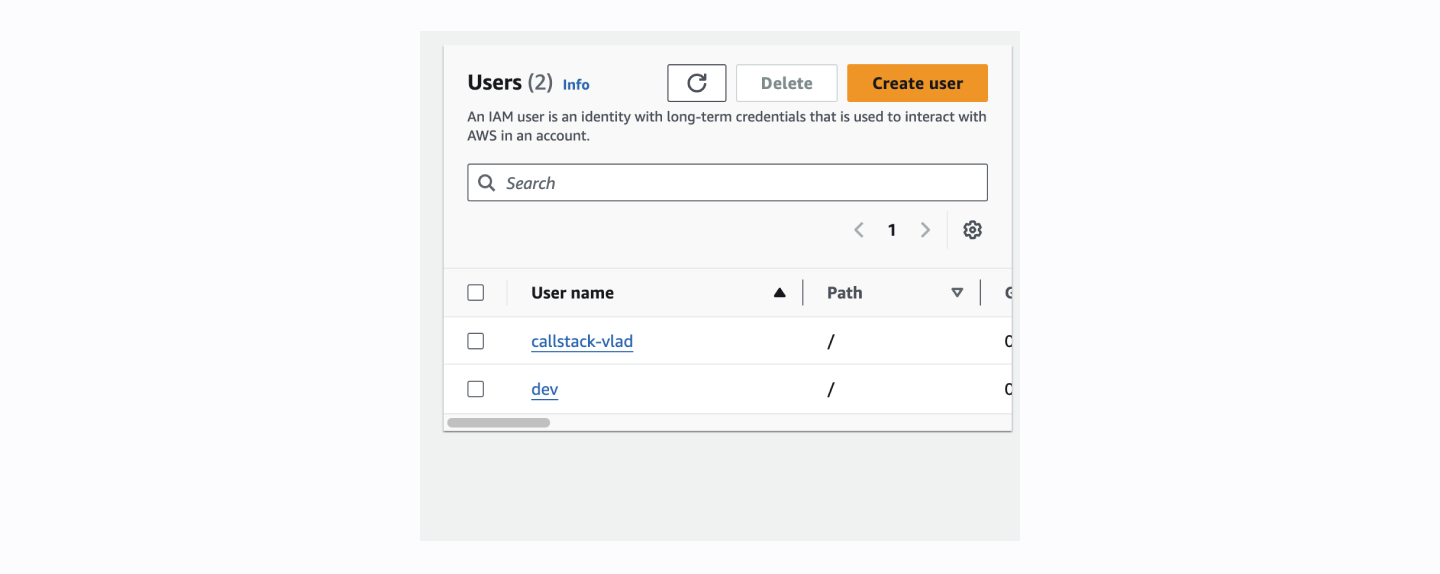
Now we are in the console of our users, where we will need to select the user we just created. If this is your first user, it may redirect you to the details right away. Below is an example of what a list of users looks like.
Step 5
Next we need to go into the user details, and get the secret keys that we will later add to our user that we configure locally on the machine. So just click: create access key.
Step 6
In the next step, we need to select Command Line Interface CLI to access our locally installed Amplify.
Step 7
Tags are optional, but I always add them for clearer handling in the future (to understand what this key is for, etc.). So now press “Create access key,” and we’re done!

Step 8
Finally, you will see the access key and secret access key. We will add them through the console soon.
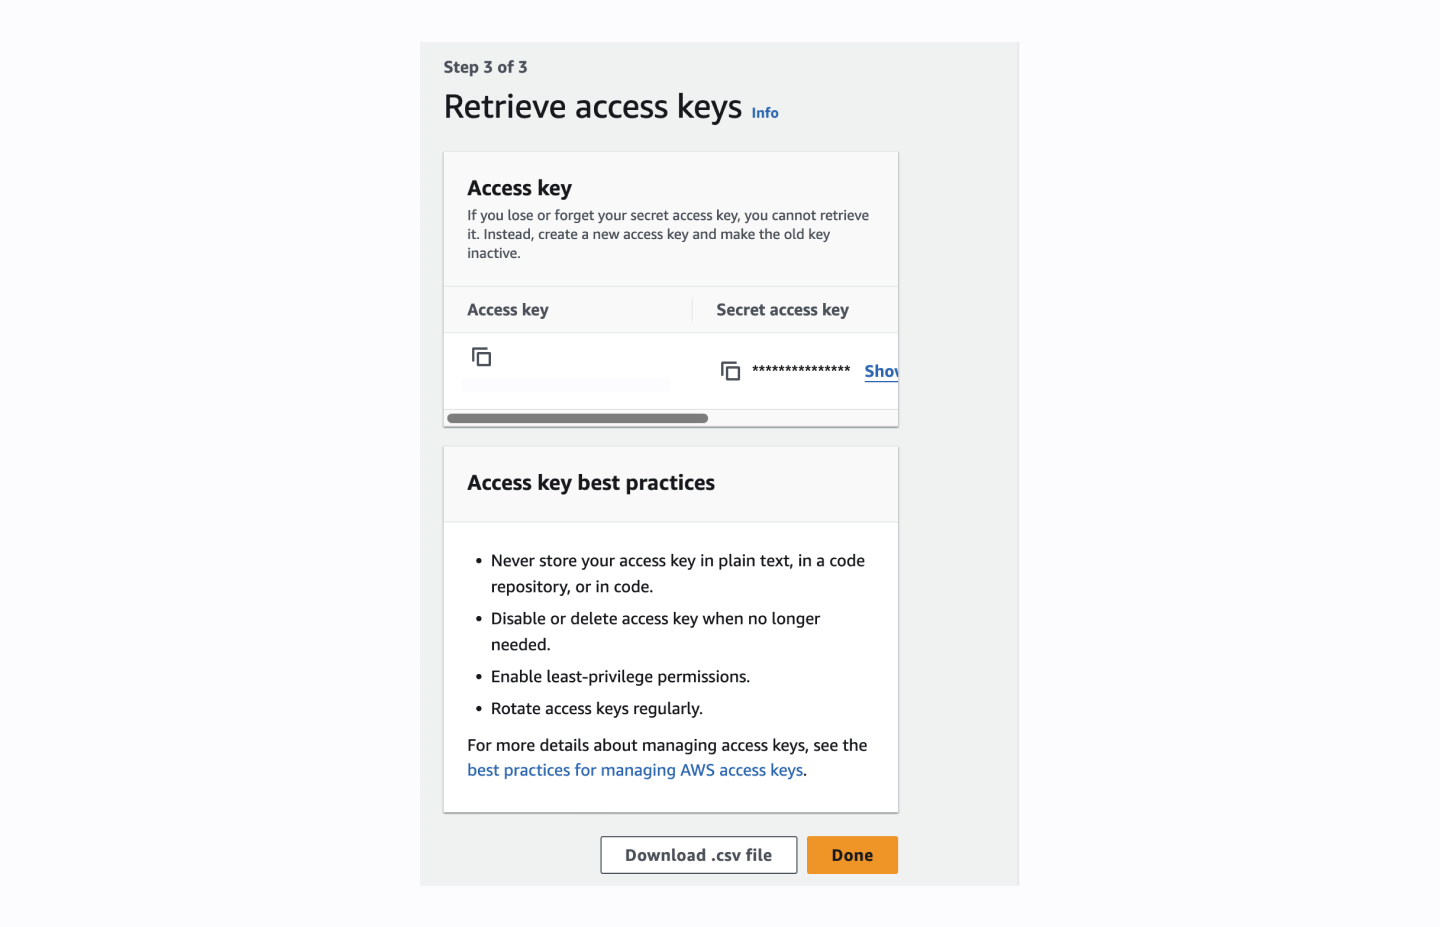
Enter the values you just copied into the corresponding CLI prompts, and that's it!
Just to double check open ~/.aws/config to see if you have there added user. You will see something like this:
If you see this and file is available, we can proceed to creating a project!
Create a project with Amplify
Create a project using CLI:
Now we need to install amplify in our project correctly, so first, we need to run the command: amplify init
Remember to choose Amplify Gen 1; of the 2nd Gen, we don't have Notifications, yet 🙂
You will have something like this. Be advised to set up properly a directory path to “ / ”
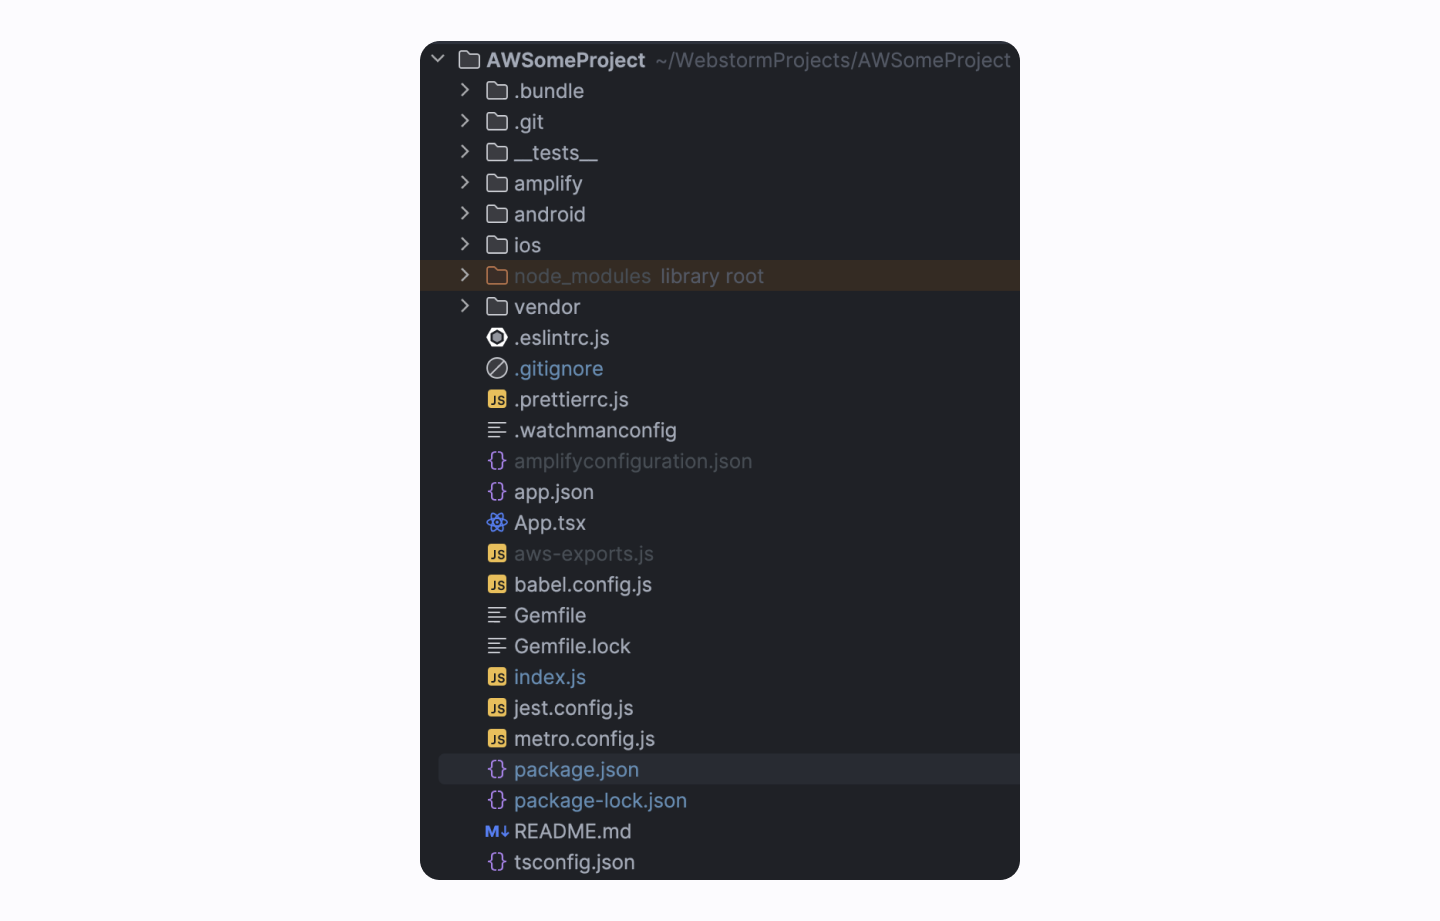
After this, you'll notice an amplify folder has been added to your project. This folder stores the backend configuration of your project, and as you add features like authentication or notifications, new files will be created within it.
You also will see a new file in the root directory calling amplifyconfiguration.json
With this helper, json react-native app will understand that we use amplify packages.
It will look like this:
Add libraries that we need to init Amplify on react-native part of the app:
After all these settings, we need to add Amplify to the application and make sure that everything works well. For this purpose, we need to initialize Amplify in the index file (the earlier, the better).
Now that we are done, let's move on and enable authentication! (You can check the app before adding auth, though.)
Add authentication via Amplify
Authentication is critical for notifications in Amazon Amplify to ensure they are delivered securely to targeted, authorized users. Authentication also provides seamless integration with AWS services, making notification processing secure and efficient.
To add authentication to your app, run this command: amplify add auth
Specify ‘sign in’ using Username, and without any additional configuration.
After this, Amplify will update the backend on the servers. However, if it doesn’t happen, you can double-check by using the amplify pushcommand.
Adding login form from Amplify
The @aws-amplify/ui-react-native package includes React Native-specific UI components you'll use to build your app. Install it with the following command:
Then we will add auth to our Main.tsx folder, the full file will look like this:
After installing, rebuild the app: npm run android
In this example you can see that we are using HOC withAuthenticator to wrap our app. Next, we will need to restart the app and see if we have a login form in the app. If we do, we will just need to create an account and then we will be inside our app!
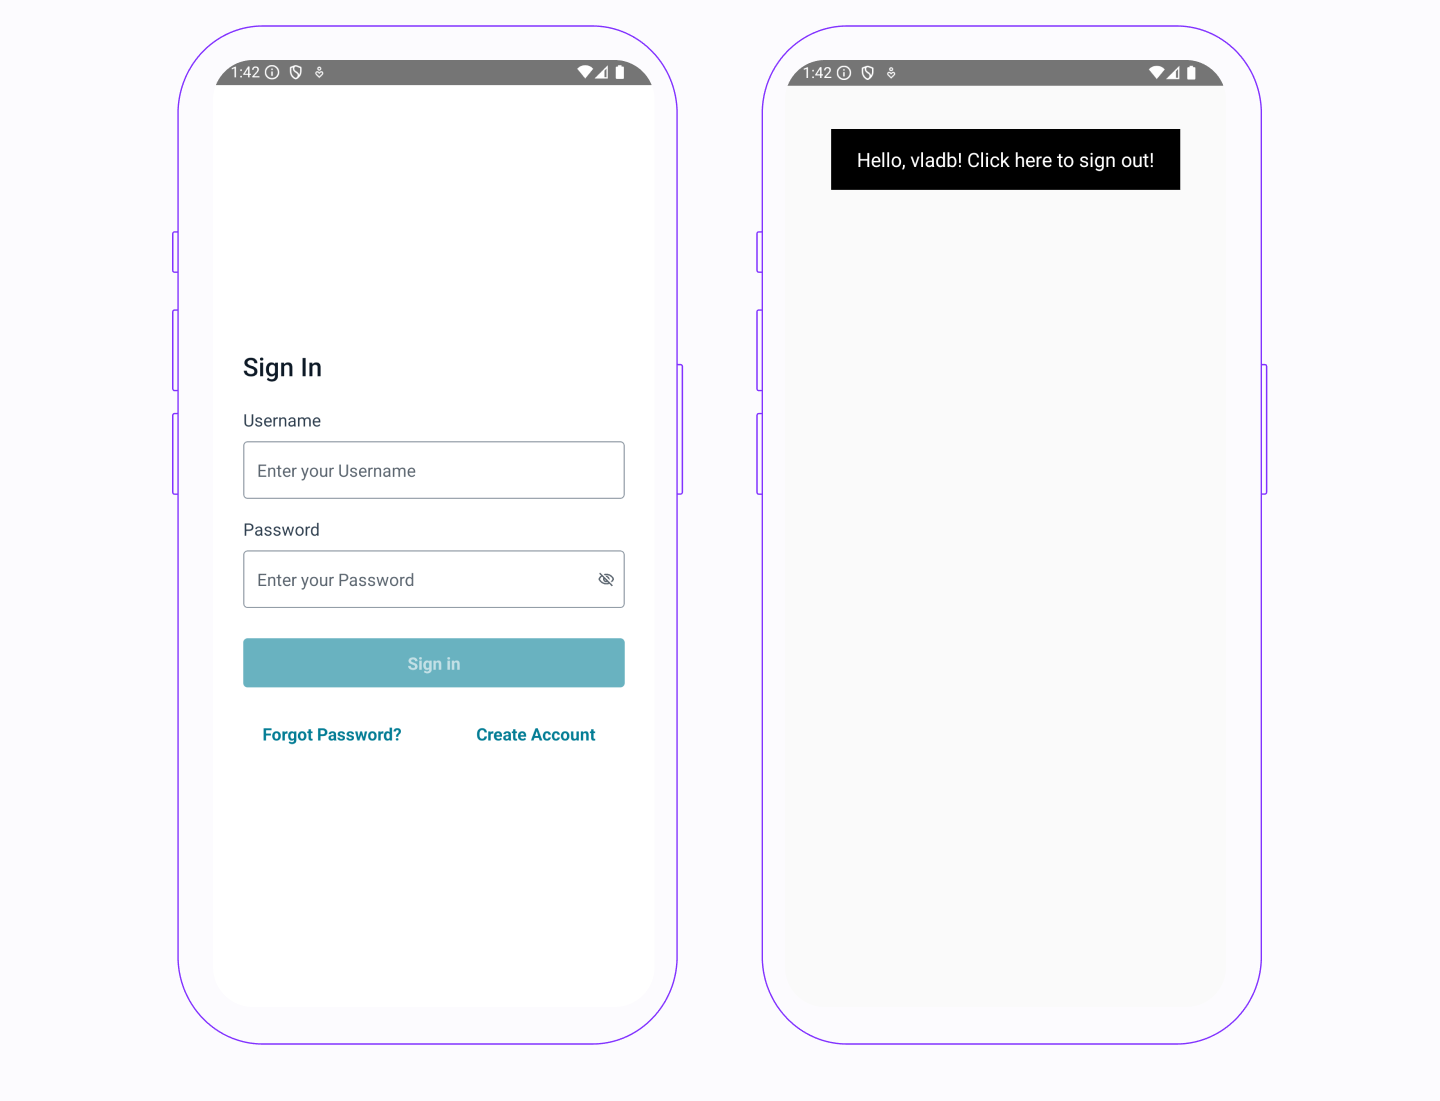
Notifications using Amplify
Adding Google Services
First, we need to add Google services because we'll still access our notifications via Firebase token. We need to add the following to the build.gradle:
And in app/build.gradle, at the top, we add:
Also we need to add google-services.json in the android/app folder like so:
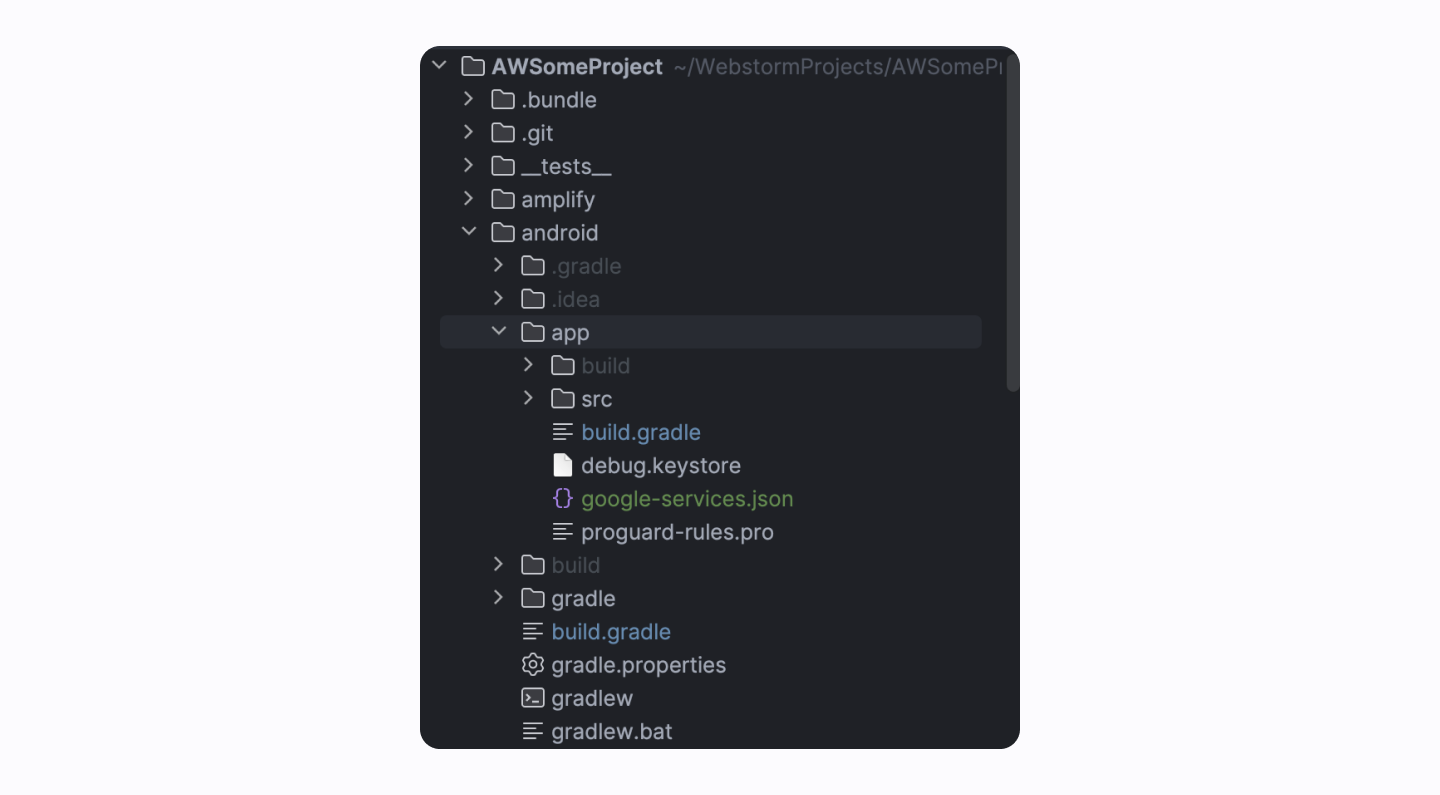
Now, let's try to build an app and check how it works!
Adding notifications on the Amplify
amplify add notifications
We need to choose FCM | » Firebase Push Notifications
- After you need to name your pinpoint resource name, basically we could name it push.
- Prompt will ask you about sending analytics, etc; just press Y for easier setup.
- After pushing notifications to the Amplify servers part, we will need to provide a service account key (json file) path.
You can get it from a Firebase account; we will not cover the setup of Firebase here, but here are small steps to follow if you already created an account in the Firebase console:
- Open Project settings
- Click on Service accounts
- Generate new private key
- Json file was generated
Pass this file to the iTerm or terminal, and you will see an absolute file path like:
users/Desktop/secret_key12345.json
Copy this path and paste it to the Amplify initialization of Notification. You will see something like this:

Next, we need to install the missing packages in our application and initialize the notification service. Packages' installations:
Reinstall app and start it, but add the following to the index.js:
It will result in something like this:
Request permissions
Yeah, you will also need to handle permissions 😭
First of all, let’s add this to manifest:
Simplified flow of retrieving permissions will be something like this:
After that, we will need to get our FCM token to test push notifications:
Receiving notifications
Well, we are almost at the final; now, I will show you how to create a hook to work with push notifications. You will need to fix it for your needs if necessary.
Test push notifications
Get FCA token
And now we will test it how it works! First of all you need to get a token from a console.
It will be something like this string:
foN_4dzDRUu0VFGG3tM:APA91bFArqe12345zVTA8ePeZq1YBxyJMnlPD4mO34kDtDy93OkEMJ-HJWgnGRwtERDejYQW-WDtuFs6GxVmDEG_DXbaIftwNp-C12345b_-mAo122PY
Put token
Now we need to put this token in the pinpoint console. It looks like this:

Then you need to find "Test messaging" and choose "Push notifications." We will test our "Notifications" using "Device tokens" in "Destinations." There you need to specify token and choose the service FCM.
The next step is to specify our Message content:
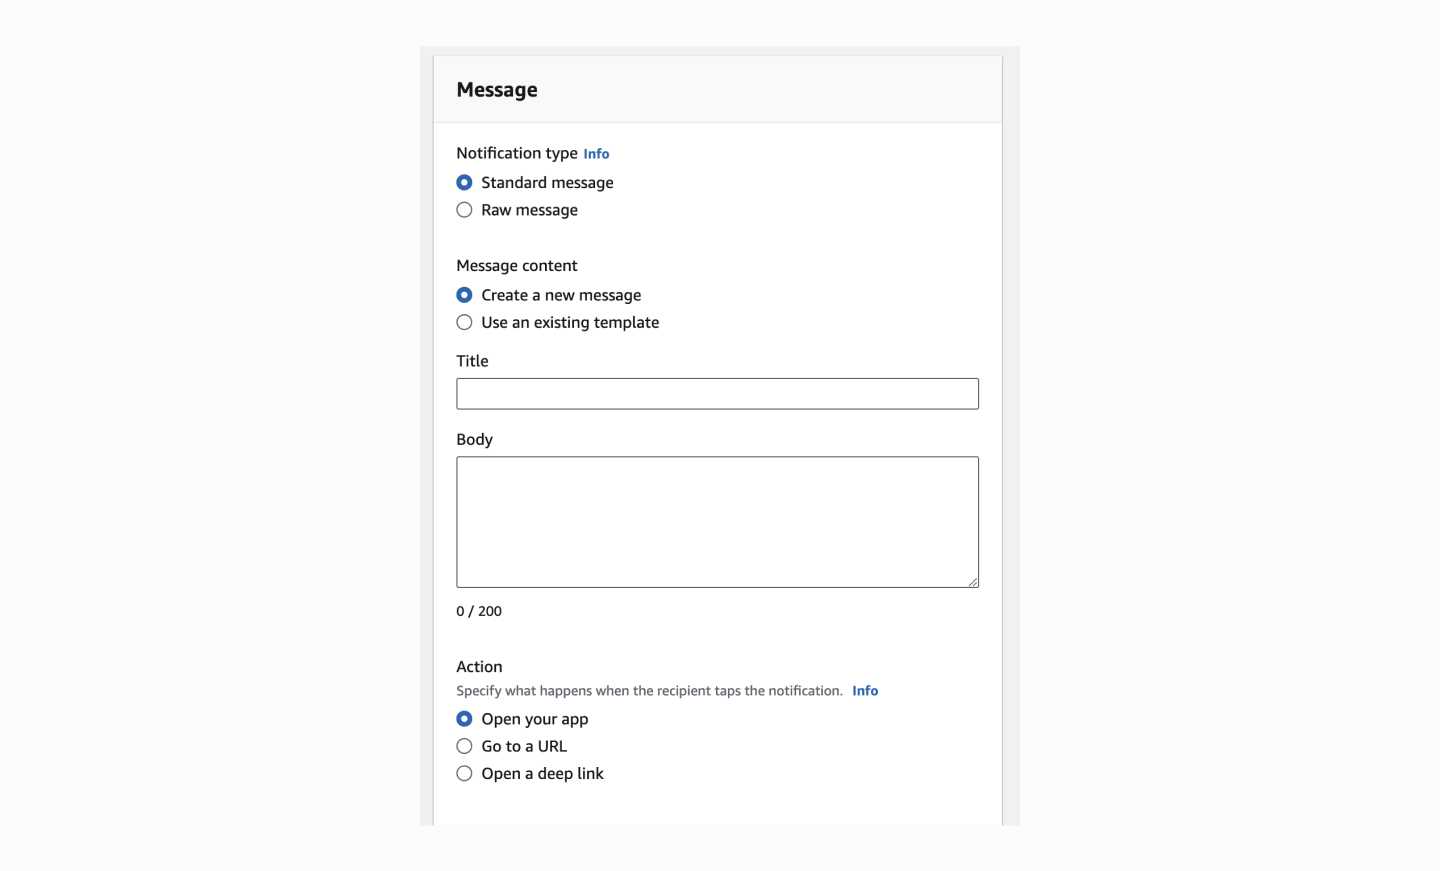
Then we press "Send Message," and voilà! We made it!
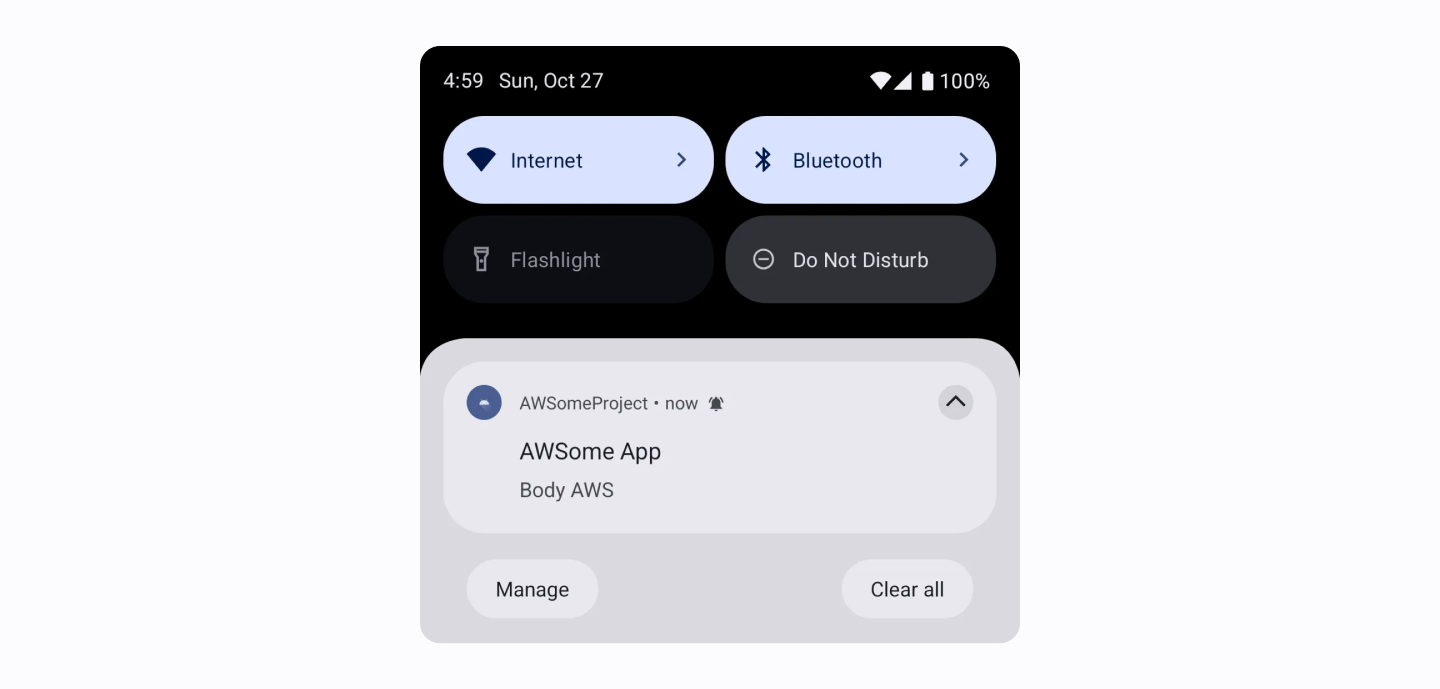
Final Notes
Implementing push notifications with AWS Amplify can be a challenging journey, and it’s not always easy to grasp everything on the first try. That’s why I created this article—to help anyone getting started with this type of notification. You can check out the fully working project I created to further guide you through this process.


Learn more about Backend
Here's everything we published recently on this topic.


